Matches have a crucial part in fylm.ai workflow. They are used for three main purposes:
- As a reference for AI Colour Extract tool
- As a reference for a Colour Match tool
- As a snapshot used to check transition from one frame to another
Additionally, Matches can be used for following secondary purposes:
- As a convenient way to save final grades for each scene and export all of the LUTs at once
- As a convenient way to save final grades for each scene and export reference images all at once
- As a convenient way to apply a grade from one frame to another
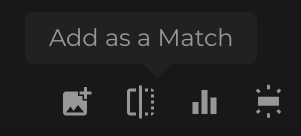
To save a grade or an image as a Match use the Add as a Match button in the lower right part of fylm.ai.
Note: You cannot save an image as a Match until you select the correct ACES Input and Output Device Transforms. Only after an image is properly colour managed you can save it as a Match.
When a Match is saved, image data and the colour grading metadata (if existing) is saved.
A saved Match appears in the Matches tab in the upper right corner of fylm.ai and is accessible from there.

Saved Matches are organised by the Bin to which they belong to in the Matches tab. There is no limit on the number of Matches you can save.
Using a Match as a reference for the AI Colour Extract tool
- First, save a reference image as a Match. Reference image is used by the AI Colour Extract tool to extract the colour grading information. Make sure you select the correct ACES Input and Output Device Transforms for the reference image before you attempt to save it as a Match.
- Select the image that you want to grade from the Project tab so that it’s loaded in the main view.
- Click on the Add Tool button in the lower left corner of fylm.ai and add the AI Colour Extract tool.
- Click on the Select Asset option in the AI Colour Extract tool to select the Match which you previously saved. Select the Match and click Apply.
- You can customise the grade by selecting different looks or by adjusting parameters in the AI Colour Extract tool.
Using a Match as a reference for the Colour Match tool
- First, save a reference image as a Match. Reference image is used by the Colour Match tool as a reference to match. Make sure you select the correct ACES Input and Output Device Transforms for the reference image before you attempt to save it as a Match.
- Select the image that you want to grade from the Project tab so that it’s loaded in the main view.
- Click on the Add Tool button in the lower left corner of fylm.ai and add the Colour Match Tool.
- Click on the Select Asset option in the Colour Match tool to select the Match which you previously saved. Select the Match and click Apply.
- Select one of the two generated looks under the Previews tab. If you are unhappy with the result, click the More Options button under the Previews tab to generate more options.
- You can customise the grade by selecting different looks or by adjusting parameters in the Colour Match tool under the Advanced option.
Using a Match to check transition from one frame to another
- Save a grade as a Match.
- Select another image and grade it.
- Open the Matches tab in the upper right corner of fylm.ai and click on a Match previously saved. This superimposes the Match over the active image in the main viewer area.
- Drag the slider left-to-right to go between the active image and the saved Match. You can continue editing the active image as you normally would while a Match is superimposed over the image. This makes it easier to match the two shots. Click a different Match to superimpose that Match over the main image. Click the selected Match again to deselect it and get back to normal view.
- When a Match is superimposed over the main image, a Split View mode is turned on and indicates an active Match. You can click the Split View icon as well to turn the Split view off and get back to normal view.

Using Matches to export multiple LUTs at once
When a Match is saved it appears under the Matches tab. It also appears in the Matches folder inside the Bin under Project tab. You may select multiple Matches at once in the Project tab and then use the contextual menu to export a .zip file which contains multiple LUTs.
- Click on the first Match in the Matches folder inside a Bin under the Project tab.
- Hold the Shift key on your keyboard and click the last Match in the Matches folder inside a Bin under the Project tab.
- Multiple Matches are selected.
- Hover with your mouse over any one of the selected Matches and select the Download a LUT button.
- When exporting multiple LUTs you cannot change their names. LUT names will inherit the respective Matches names.
- Click on Export button.
Using Matches to export multiple reference images at once
When a Match is saved it appears under the Matches tab. It also appears in the Matches folder inside the Bin under Project tab. You may select multiple Matches at once in the Project tab and then use the contextual menu to export a .zip file which contains multiple images, each representing a different Match.
- Click on the first Match in the Matches folder inside a Bin under the Project tab.
- Hold the Shift key on your keyboard and click the last Match in the Matches folder inside a Bin under the Project tab.
- Multiple Matches are selected.
- Hover with your mouse over any one of the selected Matches and select the Save Image button.
- A .zip file is created and automatically downloaded which contains all of the images representing the selected Matches.
Using a Match to apply a grade from one frame to another
When a Match is saved, image data and the colour grading metadata (if existing) is saved. You can use this colour grading metadata to easily apply a grade from one frame to another.
- Save a grade as a Match.
- Select another image you would like to grade.
- Open the Matches tab and click the three dots icon in the lower right corner of the Match you previously saved.
- Click on the Apply Grade option.
- The grade from the Match is applied on the active image.