Your colour grading process will usually begin once your edit is locked in place. Even if you are creating a show look to be used during principal shooting, you will do so after you have shot some test footage. Therefore, before you begin creating looks in fylm.ai, it is advisable to have your footage organised in Premiere Pro.
Exporting the still frames correctly is important as it will make your workflow in fylm.ai easier and consequentially your entire colour grading process.
There are a few rules of thumb for exporting a still frame for use in fylm.ai.
- It is best exporting a frame in log format like Log-C, S-Log3, REDLogFilm, etc. if possible and not a normalised image (like Rec709)
- Make sure you know the gamut and gamma properties of your exported stills (S-Gamut3.Cine S-Log3, Arri Wide Gamut Log-C, etc.) as they will dictate the appropriate ACES Input and Output Transforms in fylm.ai
Exporting still frames from Premiere Pro can be divided into two categories. Exporting still frames from RAW and non-RAW footage. This document covers both options.
Exporting still frames from RAW footage
By default, Premiere Pro will debayer various RAW files automatically into Rec709. We advise that you debayer your RAW footage into camera’s native log format and then export still frames from the footage.
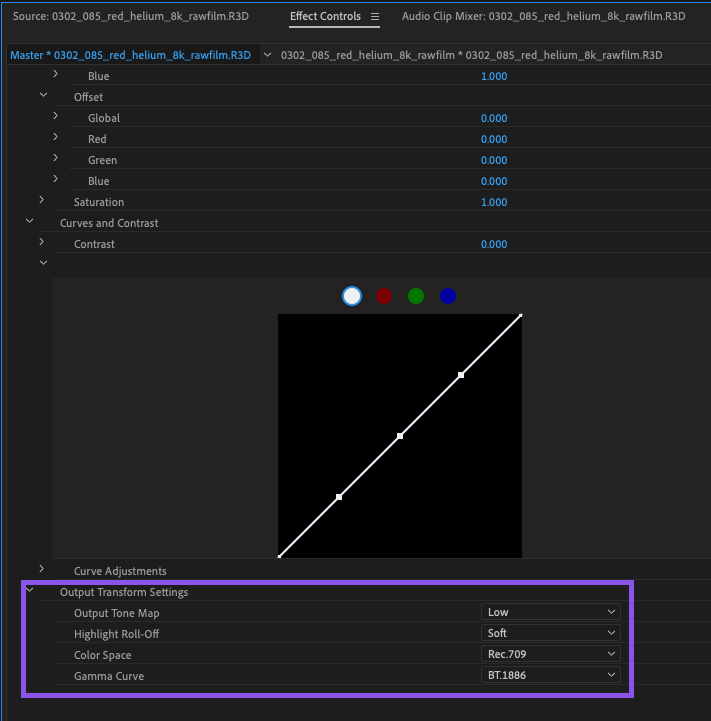
Select the Master settings panel for the clip. Scroll down to Output Transform Settings. By default, output transform settings will be set to Rec709.
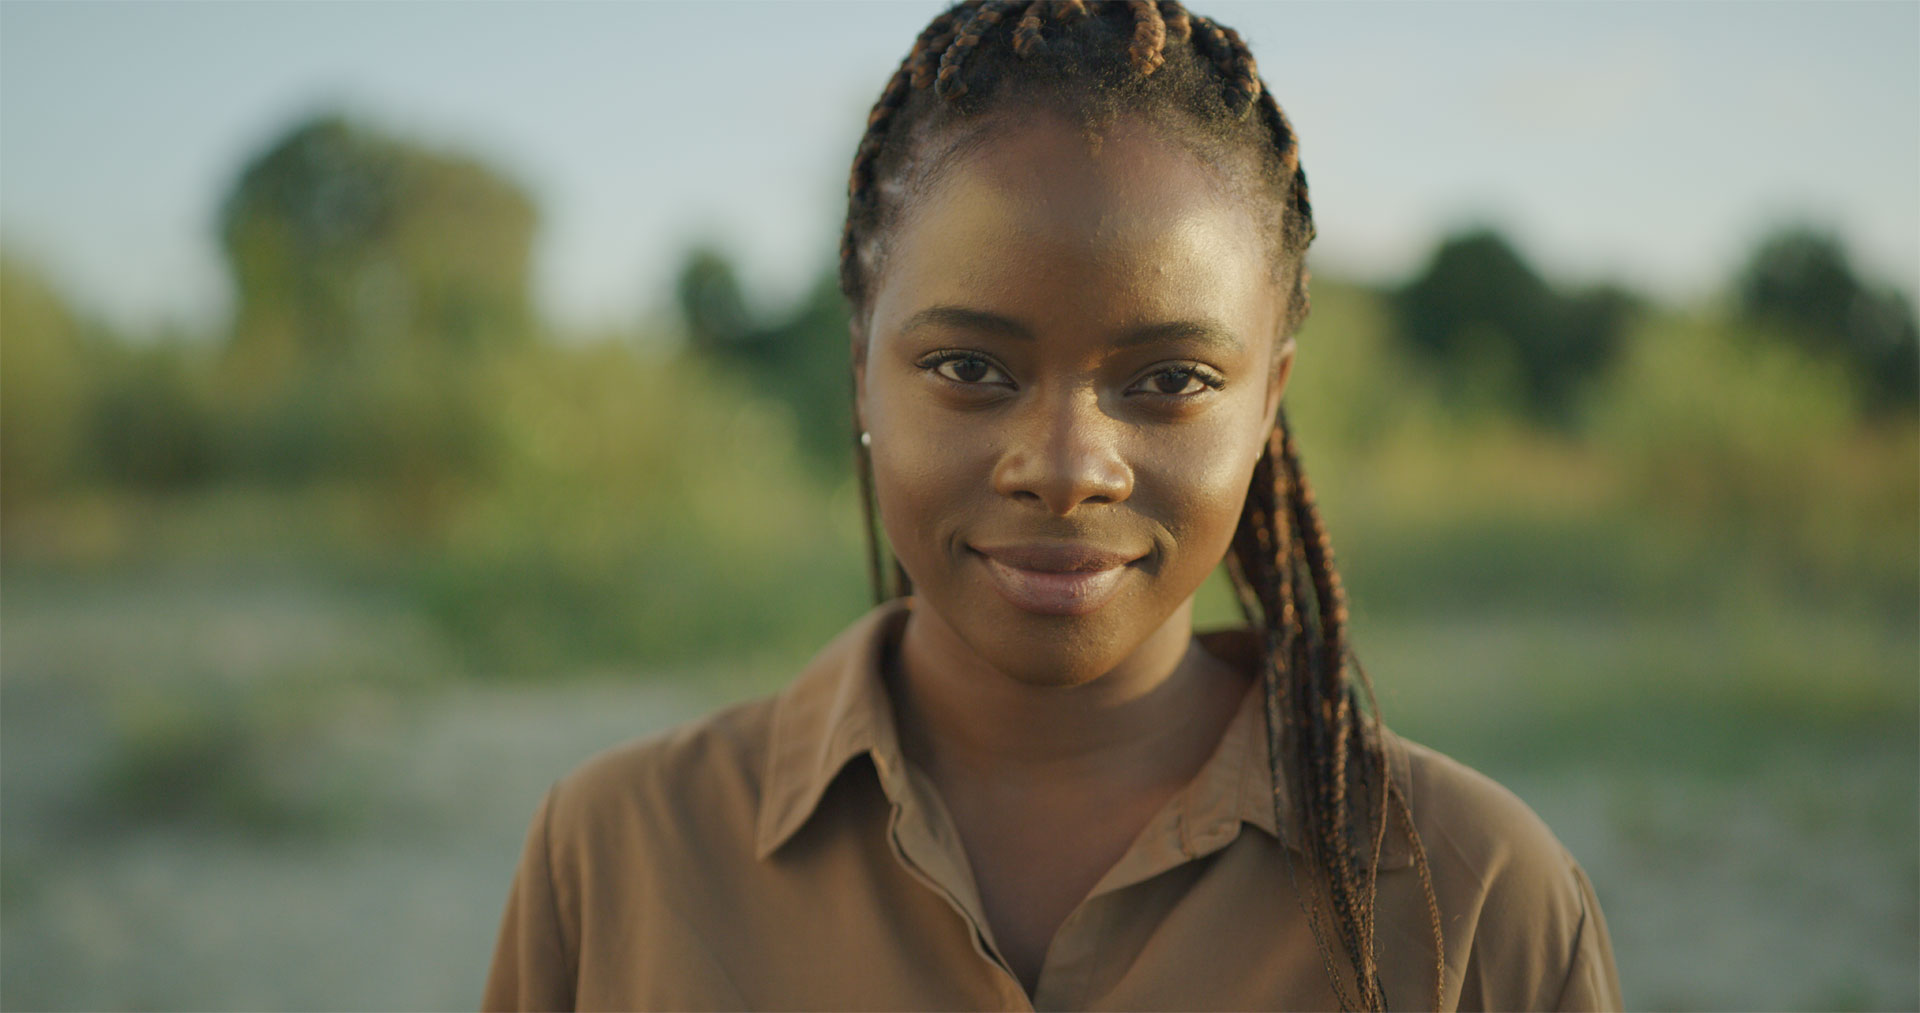
Corresponding footage, when debayered into Rec709, looks like this:
We want to change this to camera’s native log format. In this case, as we are working with RED IPP2 footage, we will choose REDWideGamutRGB Log3G10. This will of course differ depending on the camera you are using. For Arri Alexa for example, you will want to use Arri Wide Gamut Log-C.

Debayered footage into camera’s native log format looks like this:
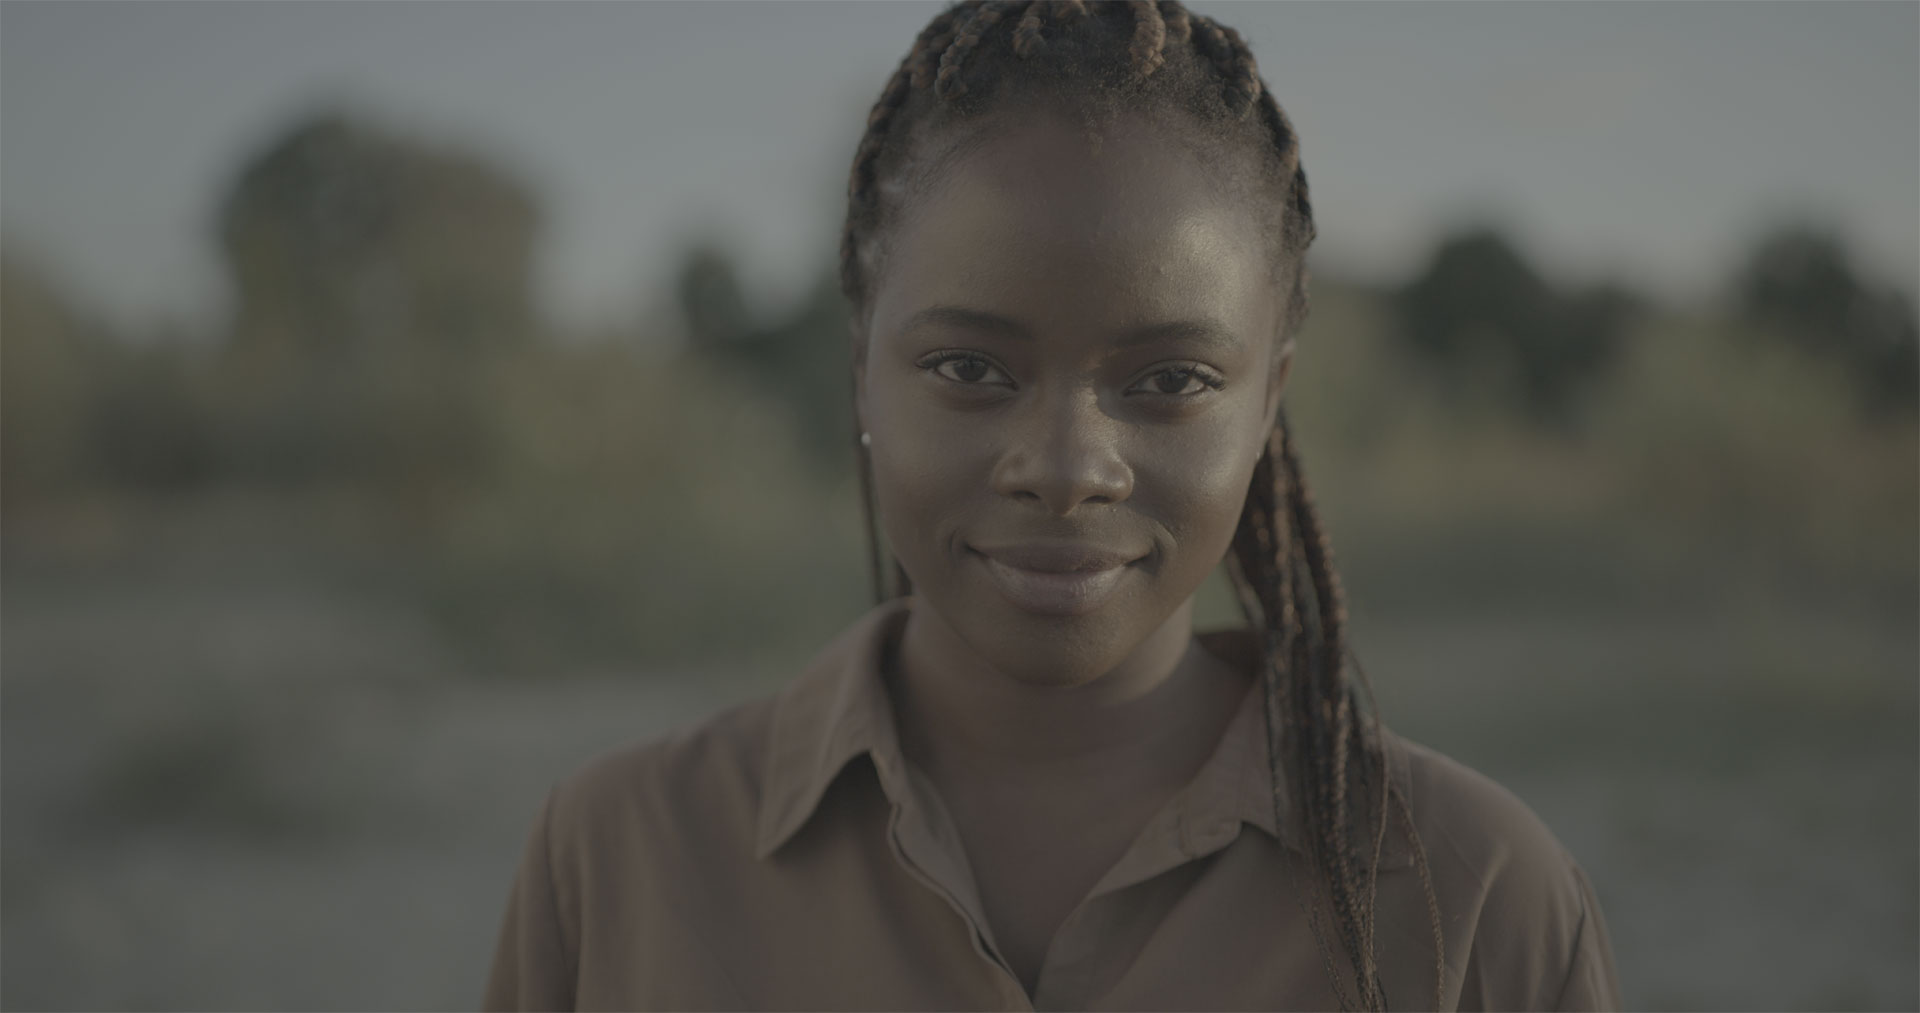
This is the still frame we want to export and use in fylm.ai.
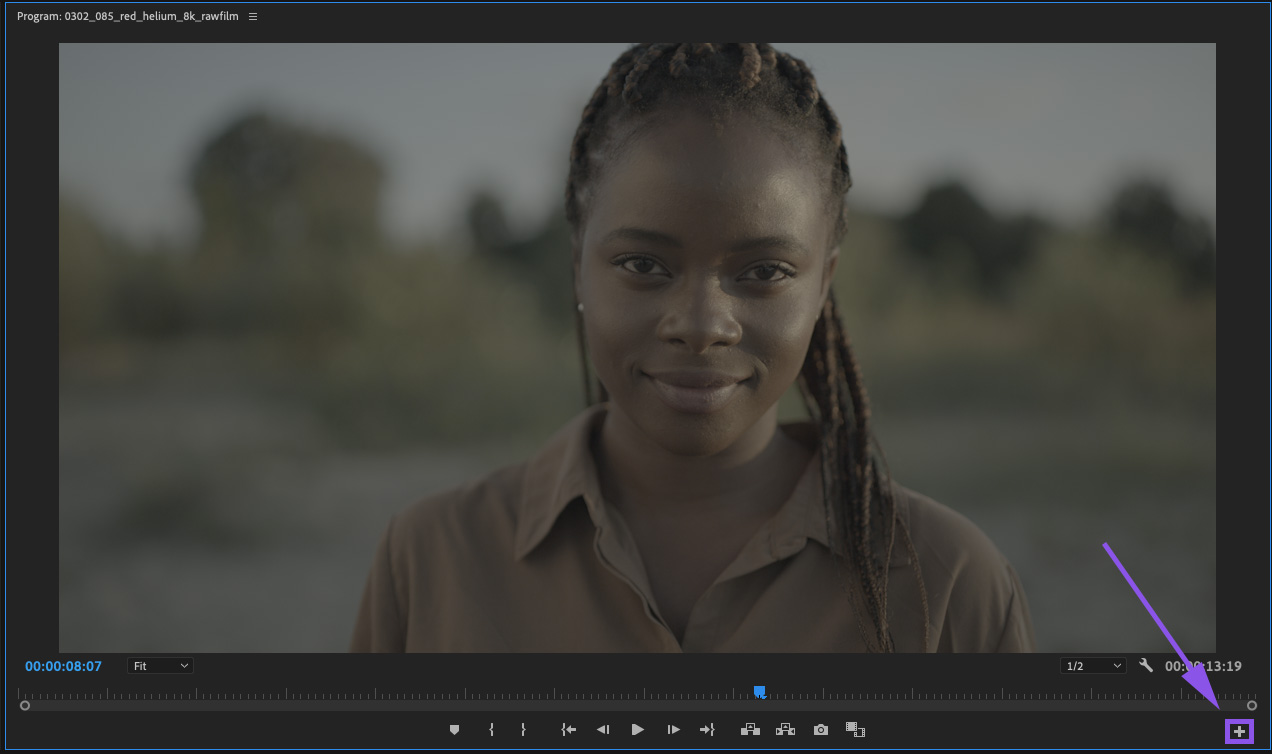
To export a still frame from your footage, click on the Export Frame button in the Program Monitor panel.
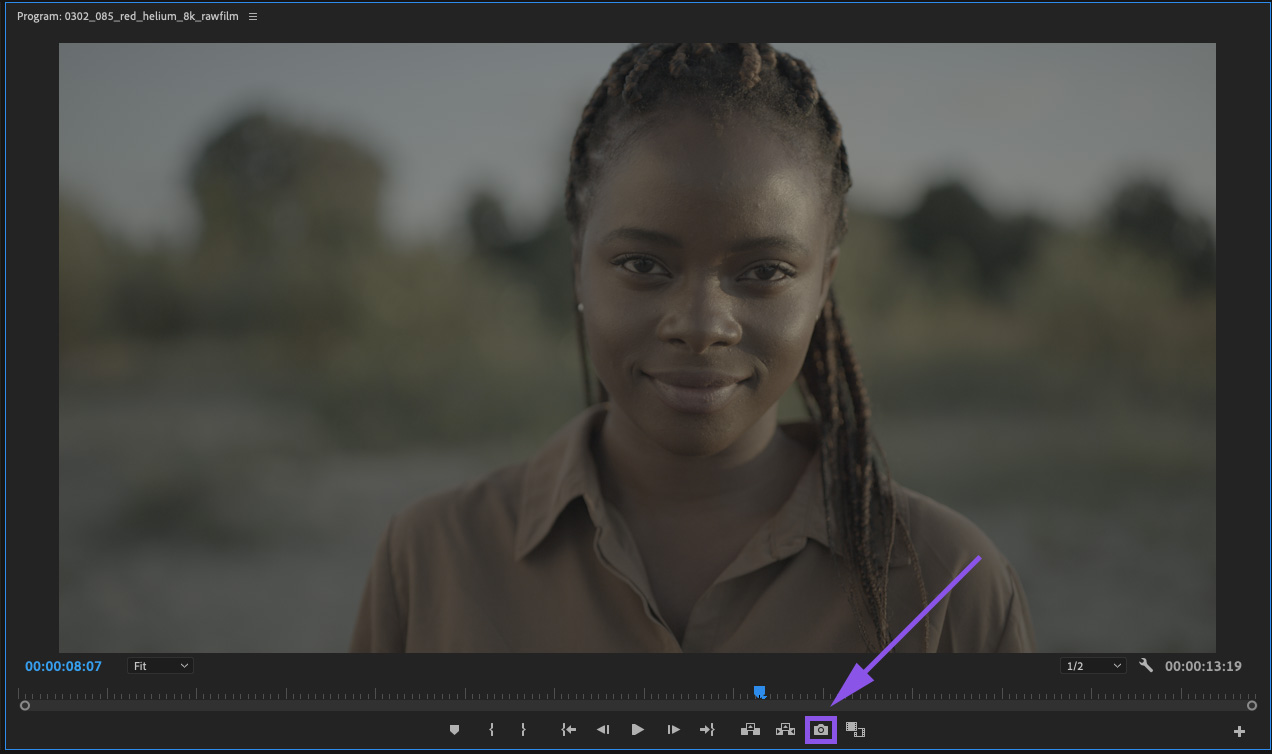
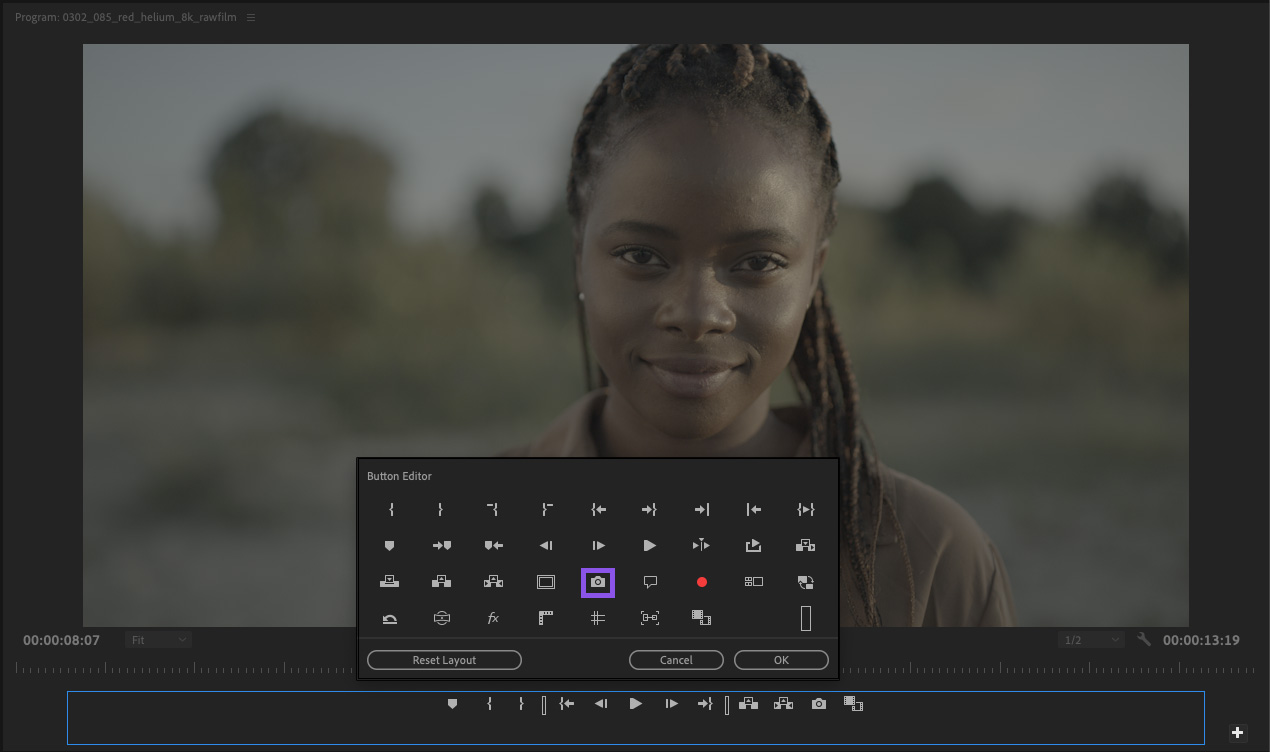
If you don’t see the Export Frame button, click on the Button Editor button, and add the Export Frame button to the toolbar in the Program Monitor panel.
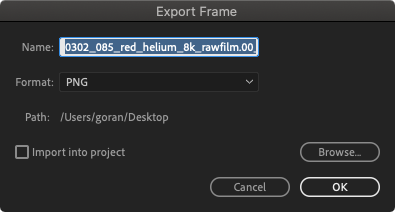
Select the name, location and format for your exported still frame. We suggest using PNG files for a good combination of image size and quality. Click OK.
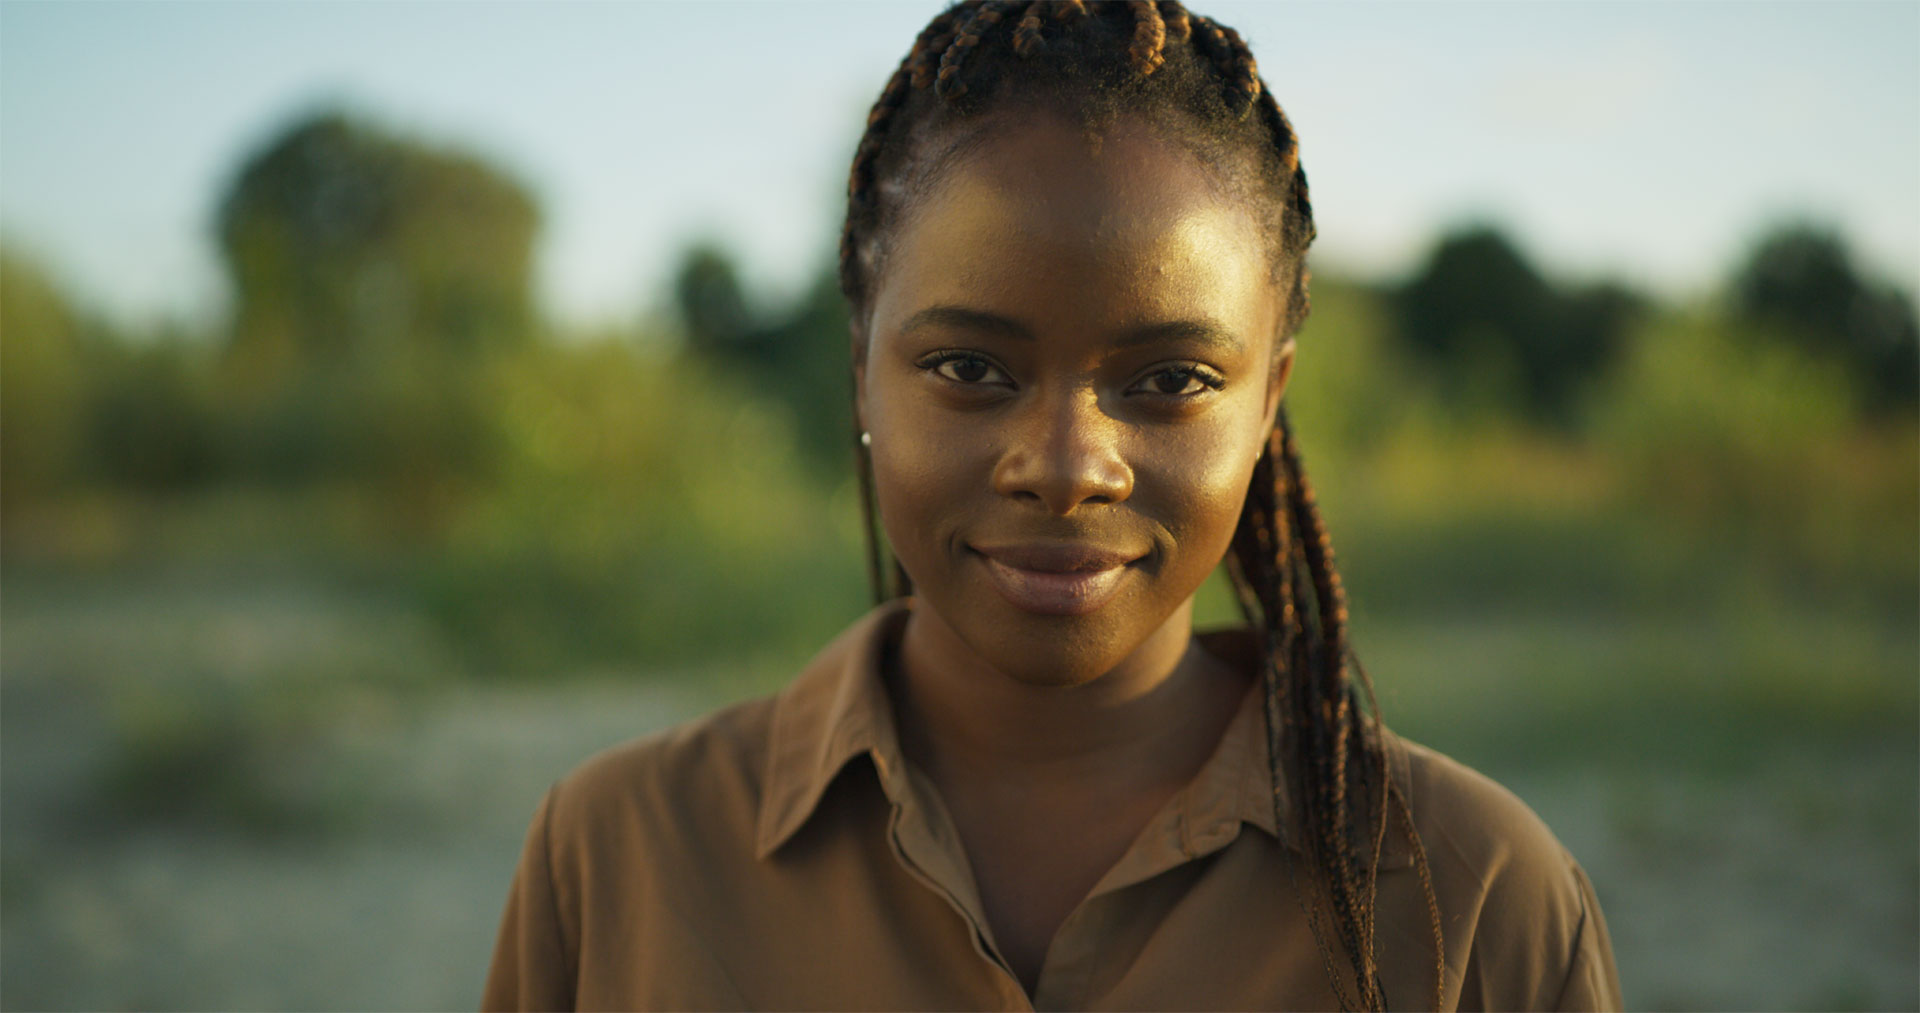
The still frame is now exported and ready to be used in fylm.ai.
When you load this image in fylm.ai, you should use the appropriate Input and Output Device Transforms. In this case, that would be ‘REDWideGamutRGB Log3G10’ for Input Device Transform, and your Output Device Transform should match the calibration point of your monitor. For example ‘Rec709’. Please see this document for more information.
Exported still with appropriate Input and Output Device Transforms in fylm.ai looks like this:
Repeat the process to create more still frames. We recommend creating at least one still frame per shot.
Exporting still frames from non-RAW footage
Exporting still frames from non-RAW footage is similar to the process of exporting still frames from RAW footage except that when working with non-RAW footage you do not have different options for interpreting your footage one way or another. When working with non-RAW footage your footage’s colour space and gamma will be given and therefore, the exported still frame should be treated accordingly such in fylm.ai.
For example, if you’ve shot a ProRes clip on Arri Alexa in Log-C, your colour space and gamma are given – Log-C and Arri Wide Gamut. Therefore, the appropriate Input Device Transform to use in fylm.ai is ‘Arri Alexa Log-C EI 800‘. Alternatively, if you’ve shot a XAVC S-Log3 clip on Sony FS7 your colour space and gamma will most likely be S-Log3 and S-Gamut3.Cine.
fylm.ai offers a very wide range of Input Device Transforms so no matter what type of footage you are working with there’s an appropriate Input for your camera so that the images can be properly colour managed.
Therefore, when exporting a still frame from non-RAW footage simply make sure that you know which settings you used in-camera and consequently use the appropriate Input Device Transform in fylm.ai.
Useful links
Once you have exported the still frames from Premiere Pro, you are ready to add them to fylm.ai and start creating your grades. At this point you may also want to read the following tutorial: