If you are experiencing any differences between Premiere Pro and fylm.ai there may be a few possible reasons for that.
Notice: If you are exporting stills from Premiere Pro and using them in fylm.ai make sure that you do not use the JPEG format to export your stills. JPEGs exported from Premiere Pro differ significantly from the image that you see in the main viewer in Premiere Pro, especially if working with a wide gamut footage such as log footage coming directly from a camera, hence resulting in a different result.
Make sure that you use formats other than JPEG such as PNG to export your stills.
If you are using the PNG format to save your stills from Premiere Pro but the result is still different, read on.
Colour management is an important aspect of colour grading as it helps you achieve consistent colour between different devices such as digital cameras and computer displays.
By default Premiere Pro assumes Rec709 colour primaries. Therefore, depending on your display, especially if you are using a wider gamut display such as P3, it is possible that a LUT created in fylm.ai will look different in Premiere Pro.
Following are typical differences you may encounter without using a display colour management in Premiere Pro.
- Your timeline is set to Rec709 but you are using a P3 display such as on the newer Macbook Pro – LUT appears too saturated in Premiere Pro.
- Your timeline is set to Rec709 but you are using an sRGB display – LUT effect appears slightly washed out.
To solve this issue you should enable display colour management in Premiere Pro.
- To enable display colour management go to Preferences > General.
- Select Enable Display Color Management (requires GPU acceleration) from the Preferences dialog box

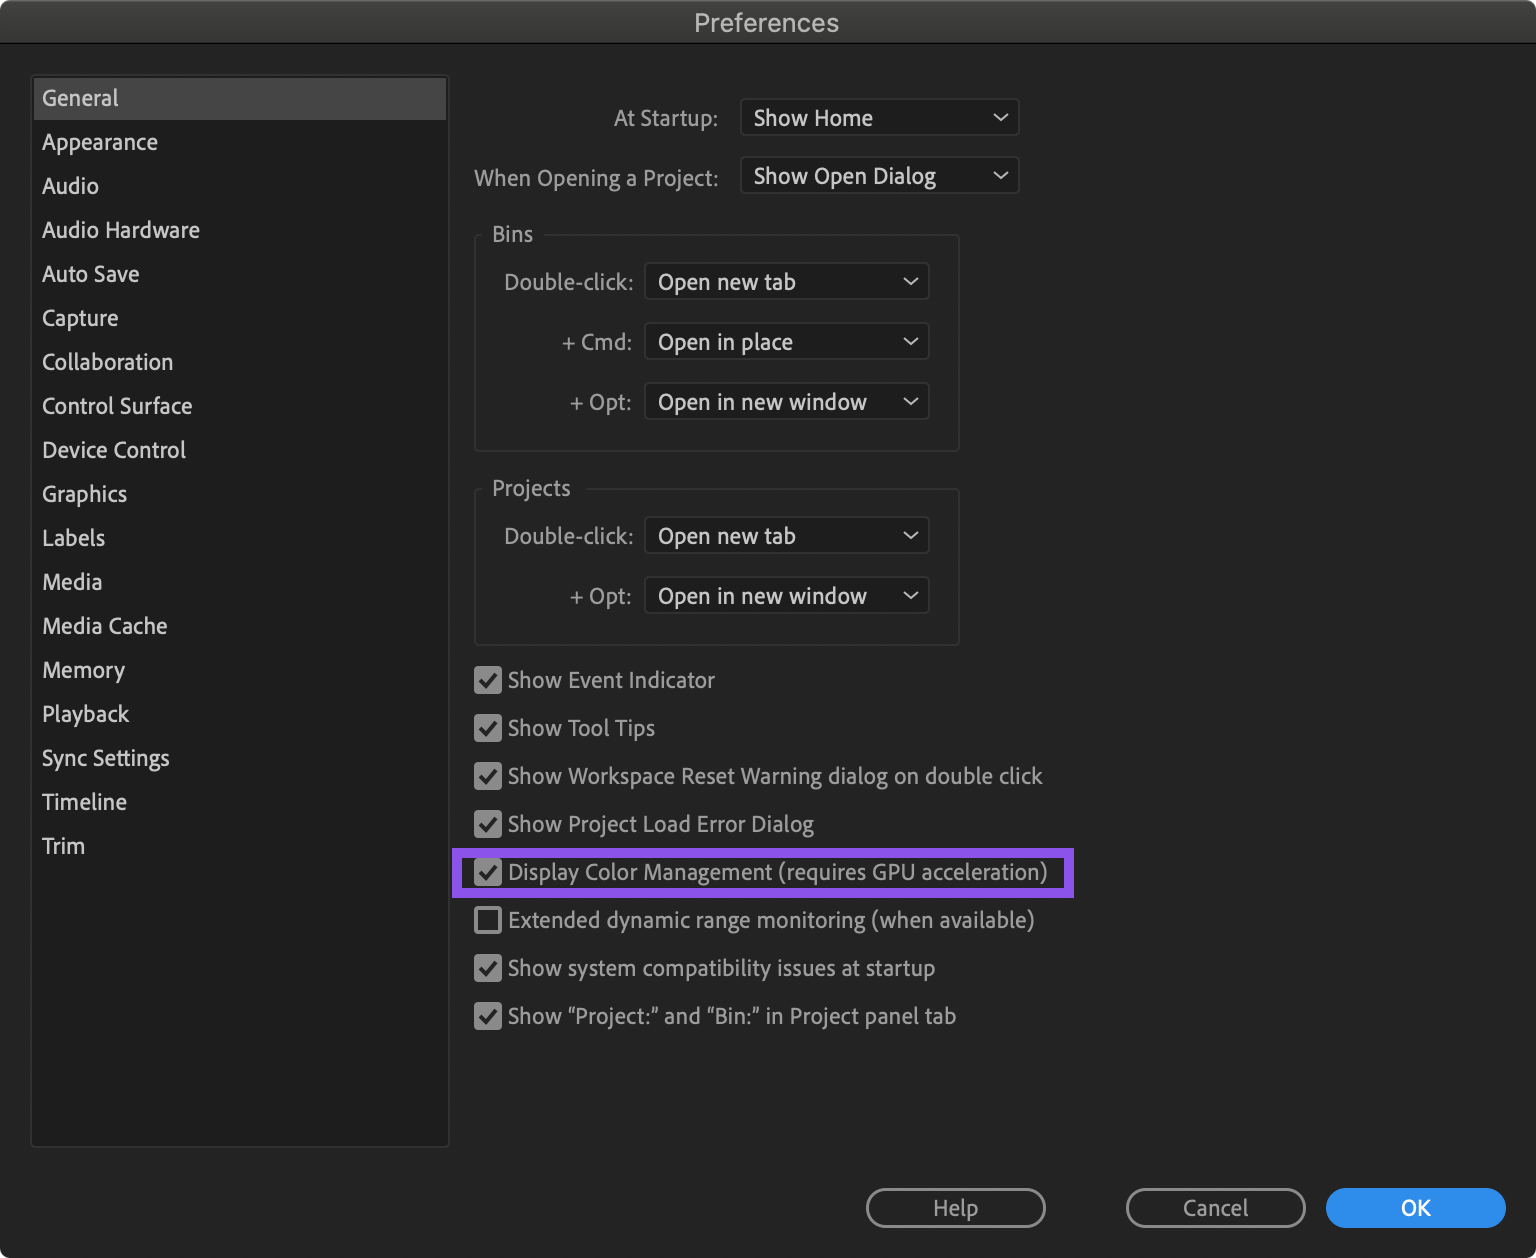
If Enable Display Color Management (requires GPU acceleration) is greyed out, do the following:
- Go to File > Project Settings > General
- Under Video Rendering and Playback in the Project settings dialog box, set the Renderer to Mercury Playback Engine GPU Acceleration. Depending on your GPU you may see more than one option such as Mercury Playback Engine GPU Acceleration (Metal) or Mercury Playback Engine GPU Acceleration (OpenCL). Usually you would want to select the Recommended method.
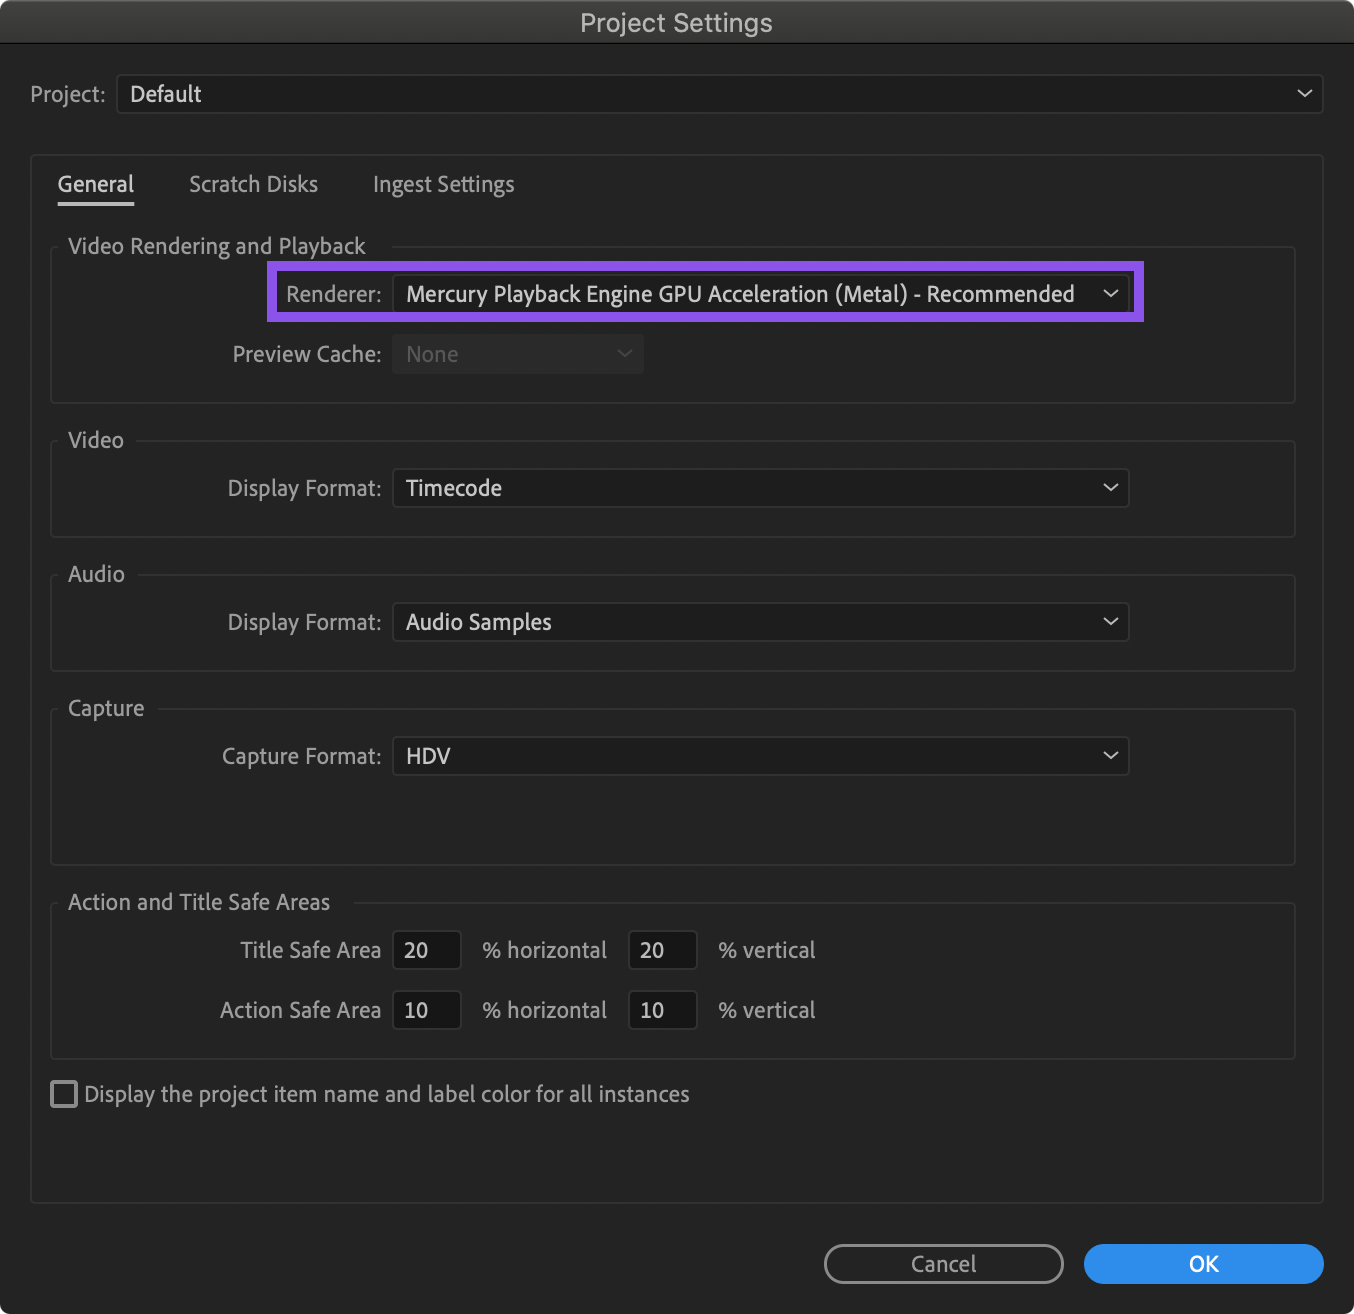
If the Renderer option is greyed out check that you have at least 1GB of RAM in your GPU and that you are using a recent GPU card.