When using fylm.ai to colour grade your work you may create several different looks for one particular image. These are Candidates. Candidates are looks you consider for the final grade for that particular image.
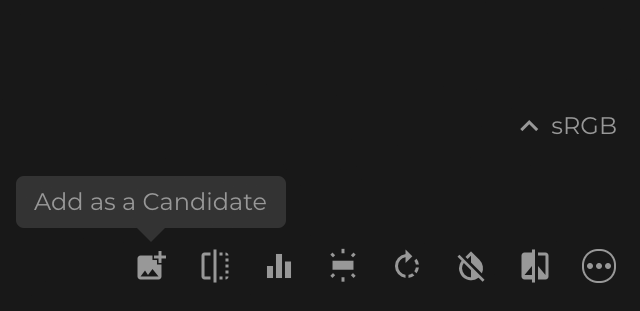
To save a look as a Candidate use the Add as a Candidate button. Candidates creation is available for team members only with Collaborator or higher permissions.
A saved Candidate is added to the Candidates tab.
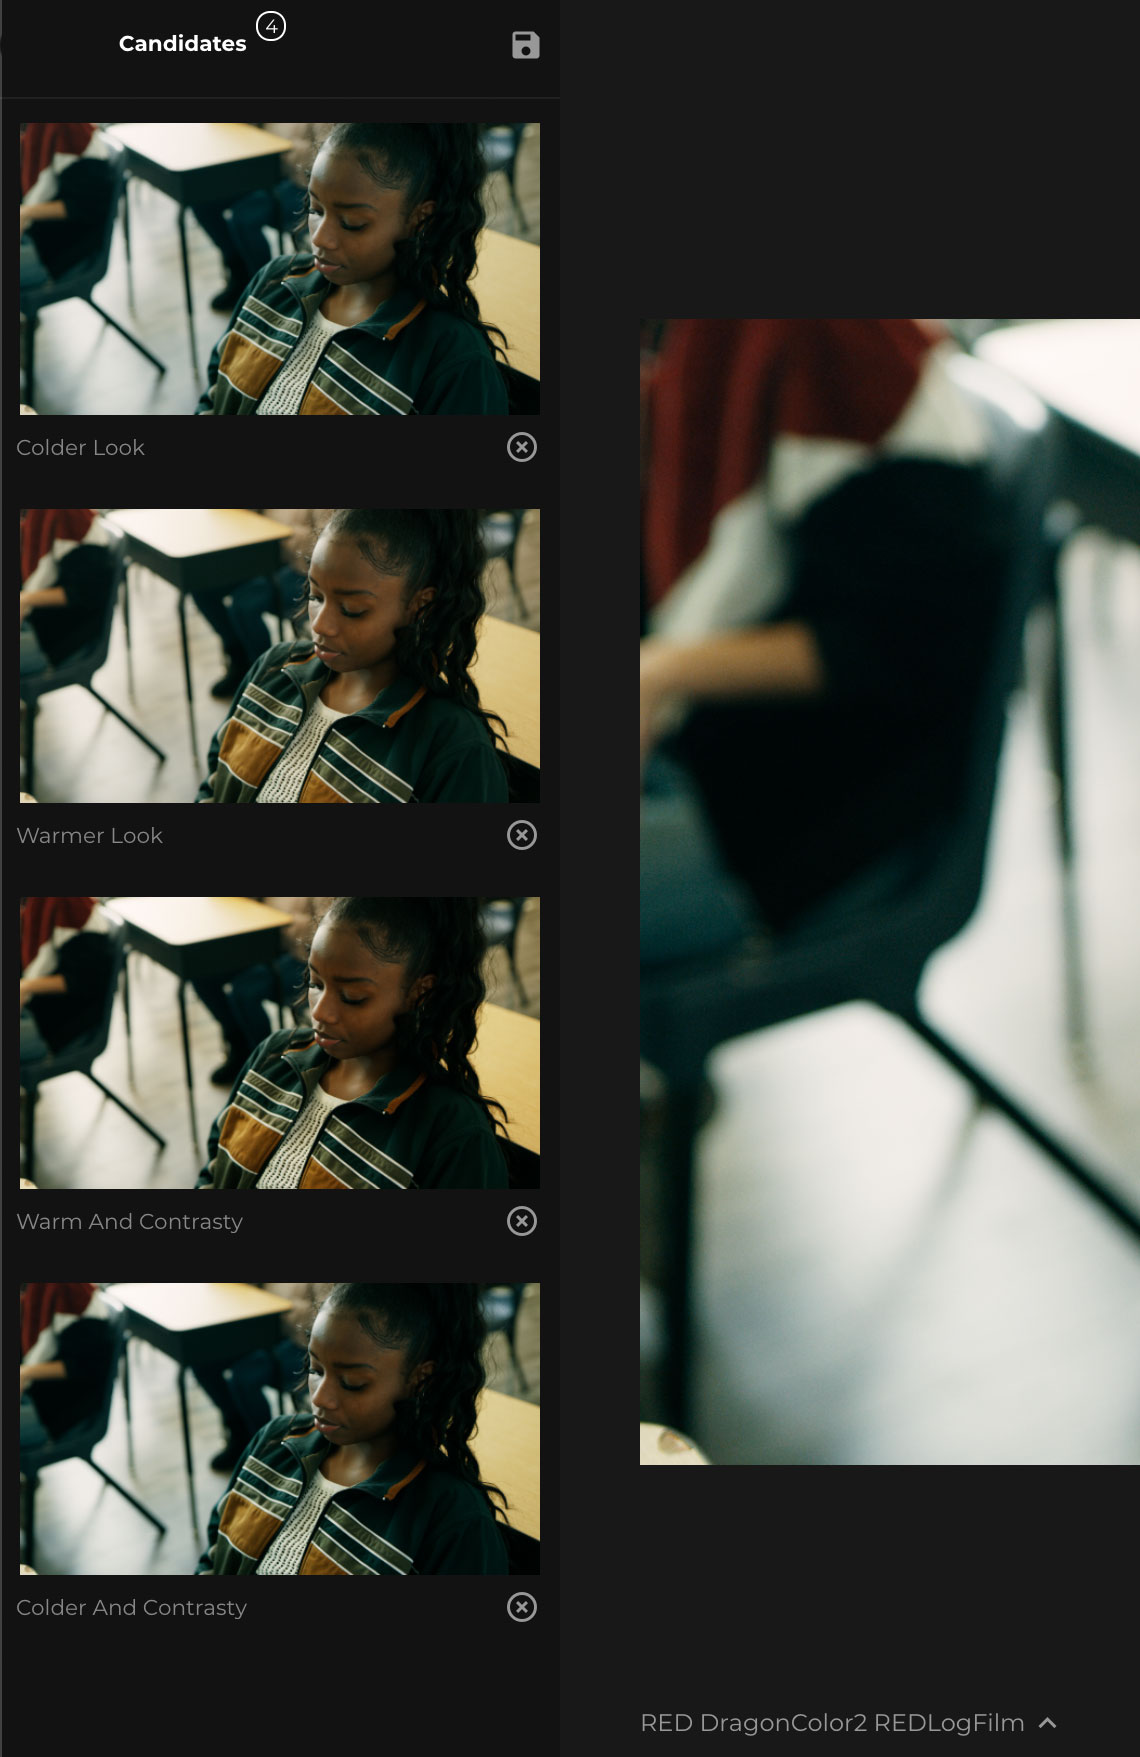
For example, you may create a slightly colder look for a particular image, but also a slightly warmer one as well as a more contrasty look. All of these can be saved as Candidates. There is no limit on the number of Candidates you can create for a particular image.
Click a Candidate to apply the look to the image.
There are three main uses for Candidates:
- Testing different looks on a particular image
- Reusing a look on a different image without having to recreate the look
- Sharing your looks with Guests (unlike Users, Guests are not part of your organisation and they only see what’s been explicitly shared with them)
By default, Candidates are attached to the asset loaded in the main viewer at the time of Candidate creation. If you would like to reuse an existing Candidate for a different asset, use the Copy Candidate To or Apply Grade To options from the contextual menu next to the Candidate.
Alternatively, you can use the Copy Candidate From option from the contextual menu, next to the item you want to reuse an existing Candidate on.
If you no longer need a particular Candidate you can delete it. To delete a Candidate simply click the Delete option from the contextual menu next to the Candidate. Candidates deletion is available for team members only with Collaborator or higher permissions.
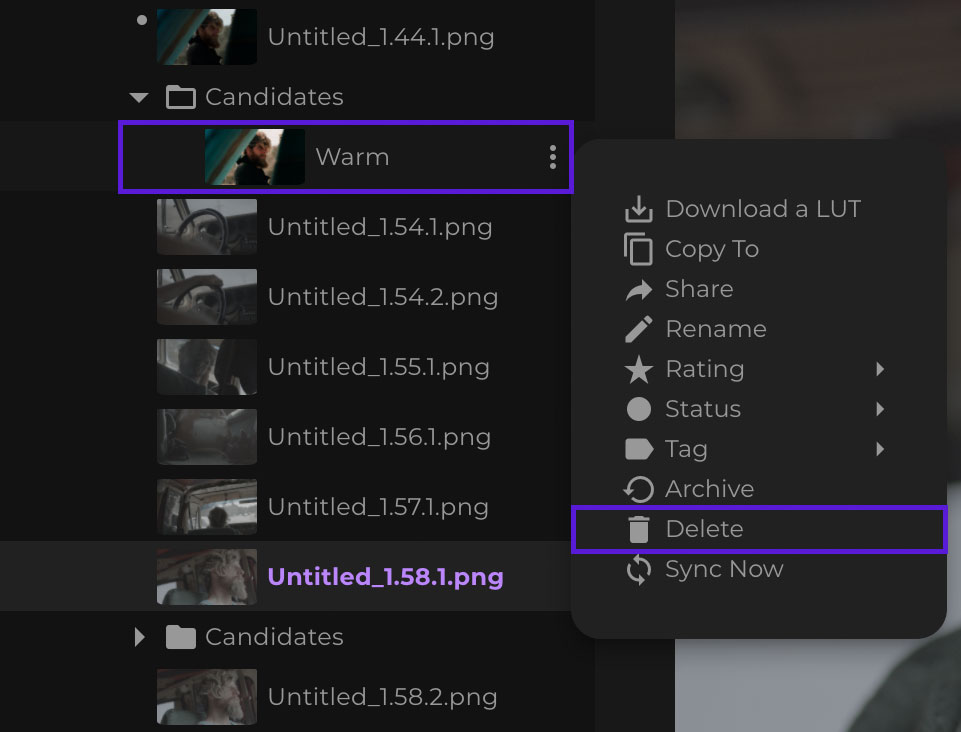
When you delete a Candidate, that Candidate is deleted only for the asset from which you have invoked the contextual menu. If you have previously duplicated a Candidate to make it available for several different assets and you would want to delete these Candidates as well, you will have to repeat the process for each asset.
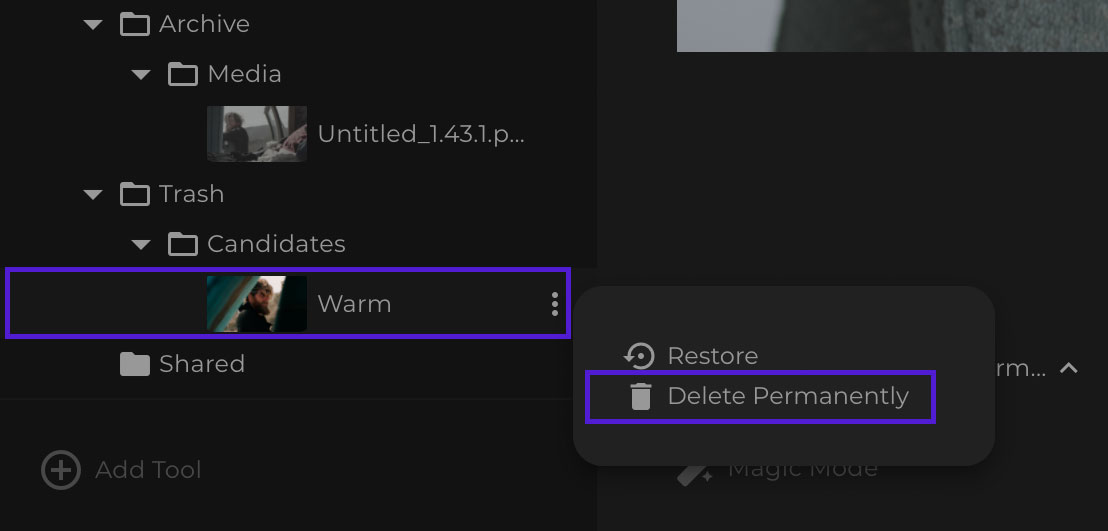
A deleted Candidate will be moved to the Trash folder. You can restore a deleted Candidate by clicking the Restore icon next to the deleted Candidate.
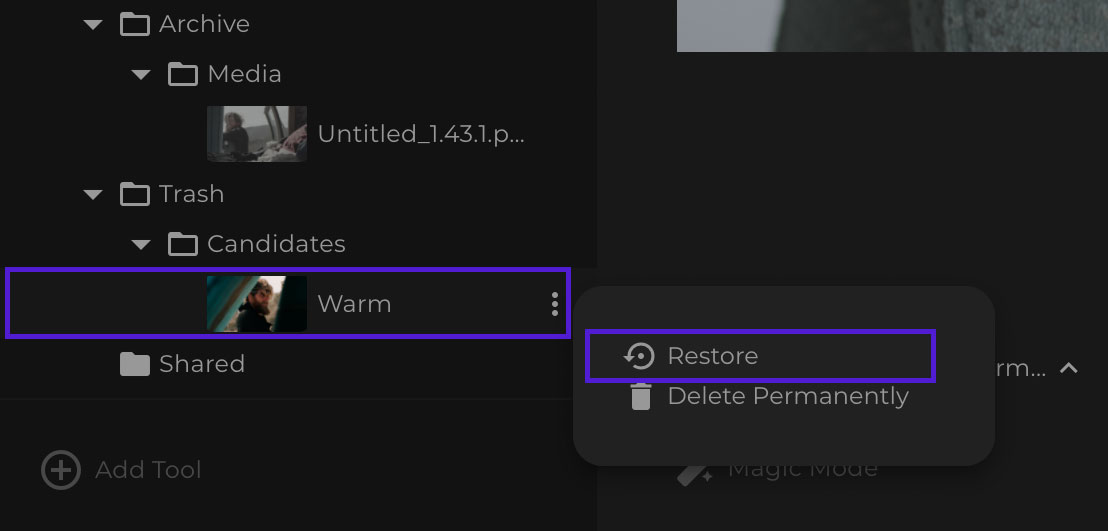
To permanently delete a Candidate use the Delete Permanently option.
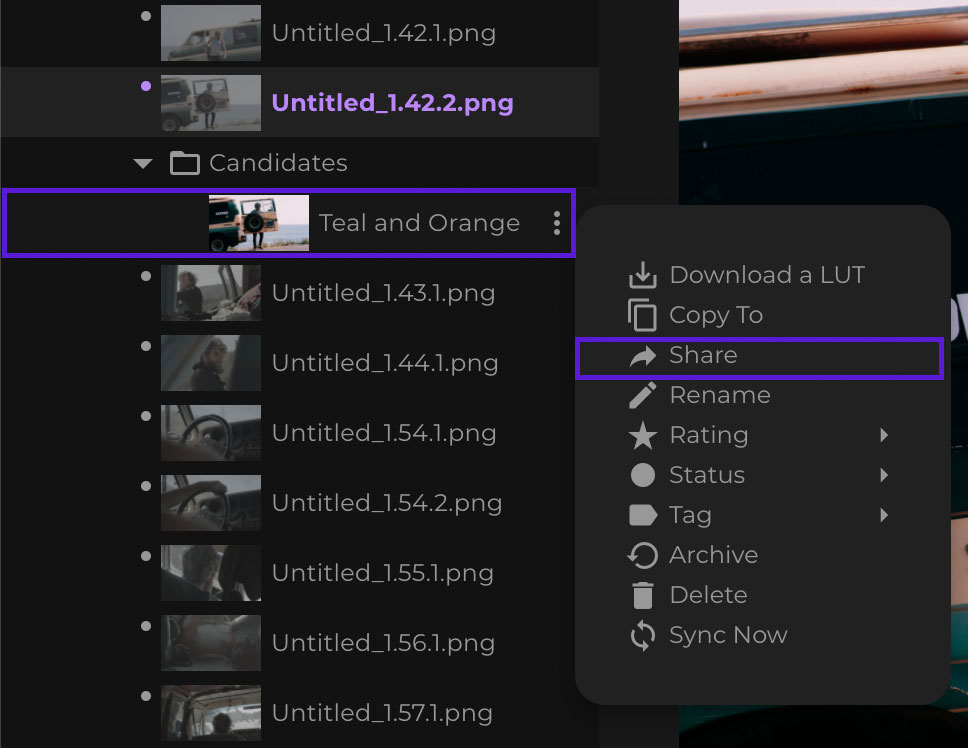
As Candidates are looks being considered for a particular colour grade, they can be shared with guests. To share a Candidate, click the Share option from the contextual menu next to a Candidate you want to share.
Sharing a Candidate creates a copy in the Shared folder. Any Guests assigned to your project will be able to see the contents of the Shared folder.
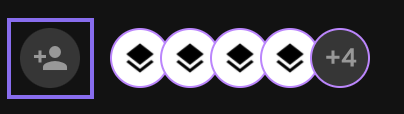
To assign a Guest to your project, please use the Manage Users and Guests button in the upper right corner of the app.
Please note that when you share an asset on Pro plan, the entire comment thread for the Bin the shared Candidate belongs to, is visible to the guest. Team-only comments are available on the Team plan and higher. For more information please visit this document.
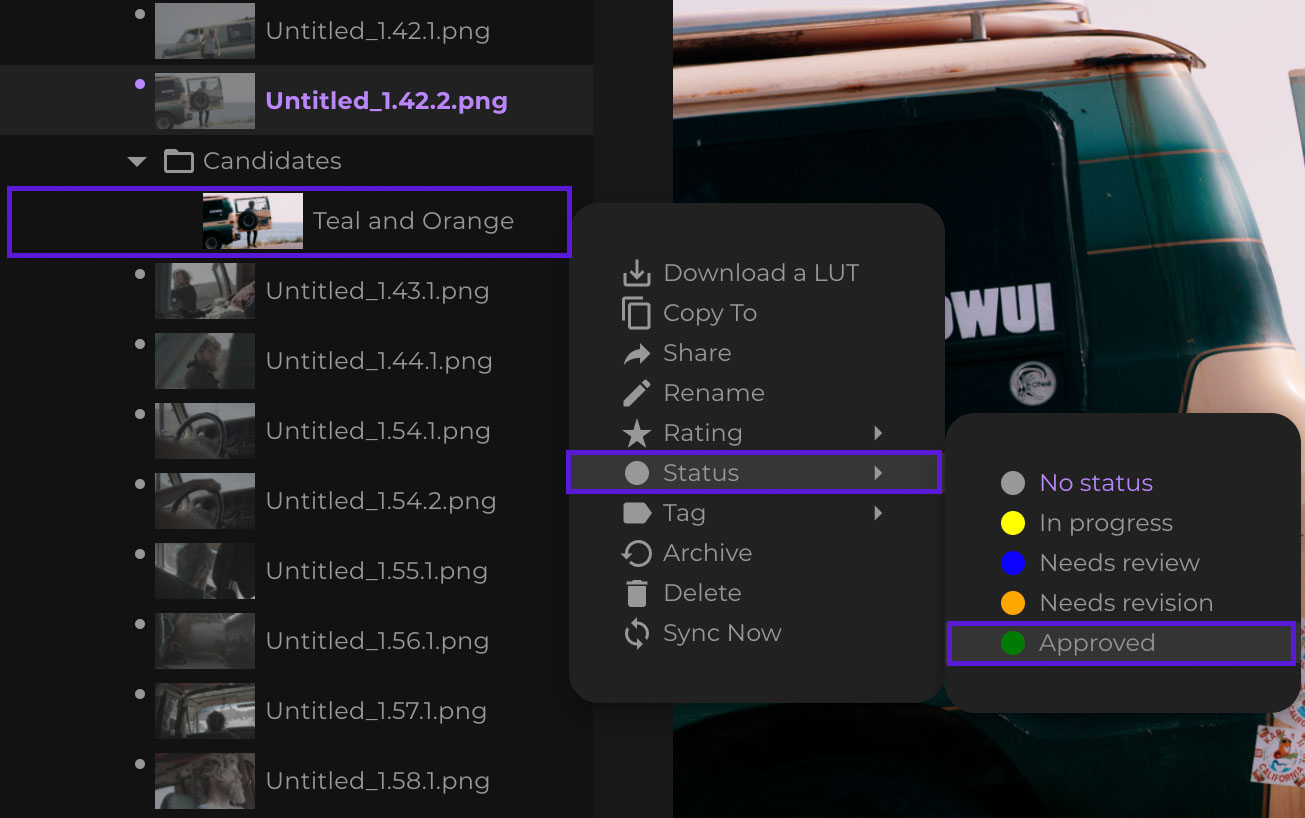
To change the status of the Candidate use the Status option from the contextual menu next to the Candidate. The ability to change the status of a Candidate for non-organisation members is limited to Team plan and higher. Status change of an asset for members of an organisation requires a Collaborator permission or higher.
To Unshare the Candidate, select the Candidate in the Shared folder and select the Unshare option from the contextual menu. Please note that if you unshare a Candidate, it will no longer be visible to the guests, even if they previously were able to see it.
To share several Candidates at once, select the first Candidate that you want to share and the hold the shift key on your keyboard and then click on the last Candidate that you want to share. All of the Candidates between the first and last will be selected. Click on the contextual menu of any one of the selected Candidates and select the Share option.