Assets in fylm.ai are managed in folders inside the project so they are always organised. When you create a project in fylm.ai, some folders are automatically created while others are created manually by the user. The purpose of this document is to introduce you to the folder structure in fylm.ai so you can manage your assets effectively.
Bin
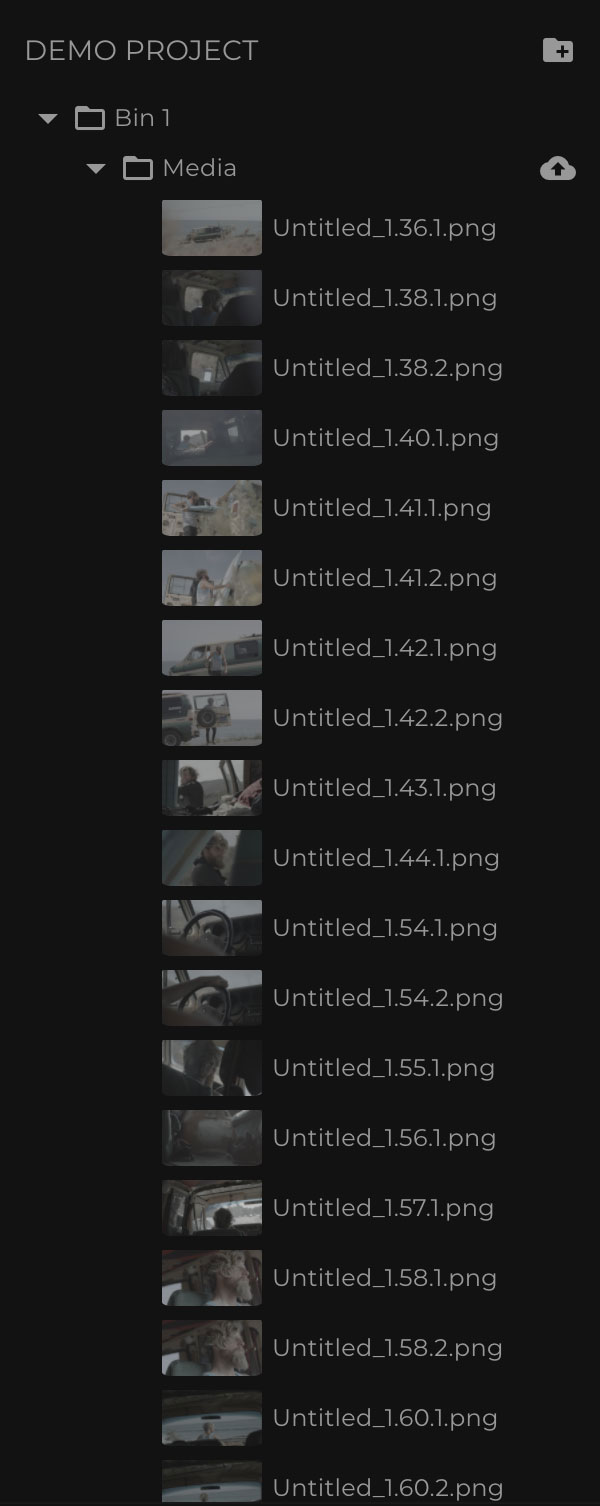
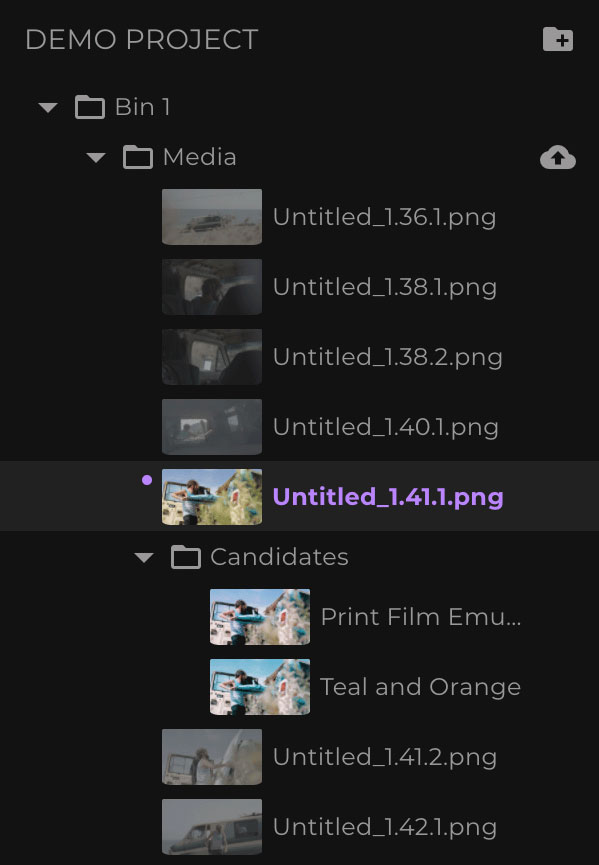
When you create a project in fylm.ai a folder named ‘Bin 1‘ is automatically created inside your project. Bins in fylm.ai represent scenes in a film. All assets for one particular scene should be kept inside appropriate Bin. That way, all images and looks reside in one place which makes it easy to mange these assets. We recommend using one Bin per scene. For very long scenes, it may be advisable to to split the contents across several Bins.
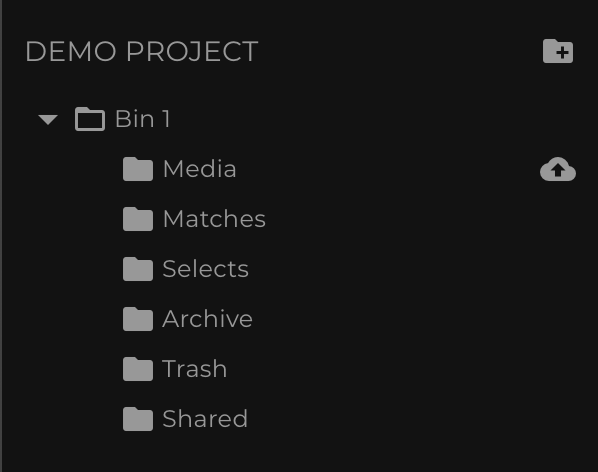
Bin 1 is a special folder and it cannot be deleted. Your project must have one Bin at the very least. If you are working on a very short film or if you are a still photographer using fylm.ai to grade the final selections of a shoot you will probably keep all your assets in Bin 1.
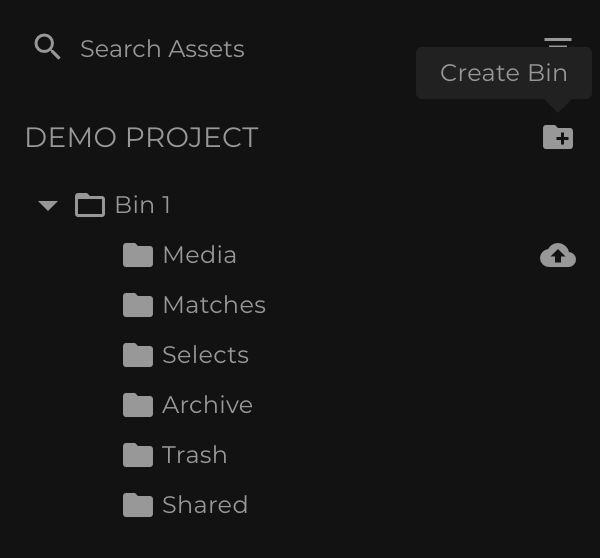
You can create additional Bins. Bins are named in sequential order, so the second Bin that you create will be named ‘Bin 2‘ and so forth. To create a new Bin, click on the ‘Create Bin‘ icon under your project.
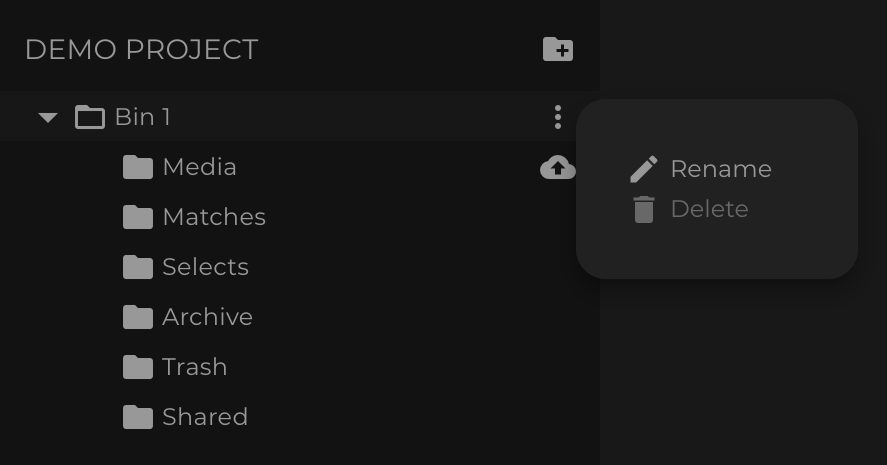
You can rename the Bins. To rename a Bin click on the contextual menu next to the Bin name and select ‘Rename‘ option next to the Bin you want to rename.
Media
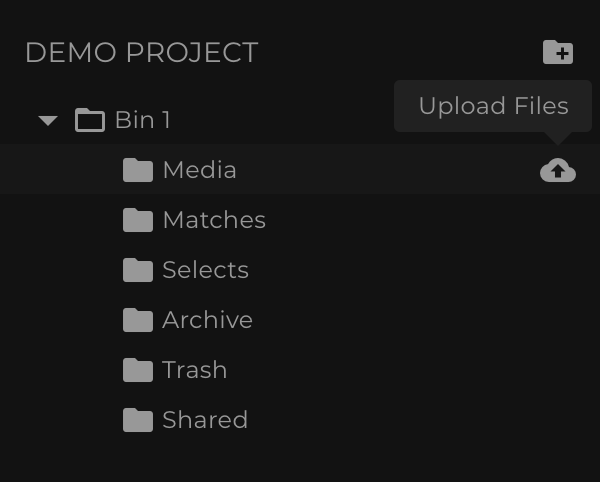
The very first step of using fylm.ai is uploading files to your project so they can be used for looks creation. To upload the files to your Bin, click on the ‘Upload Files‘ icon in your Bin.
When you upload files to a Bin, they are stored in the Media folder.
To allow you to use the app right away, even before your files have finished uploading to the cloud, the images are temporarily stored in your browser. You can start using fylm.ai immediately. Images will be uploaded in background and safely stored in your project. While a background action is running (such as uploading files to the cloud), it is indicated by a loading bar at the top of the app.
Once the background action is complete the loading bar will disappear. fylm.ai seamlessly switches from files stored in your browser to their version in the cloud depending on several factors, and automatically syncs everything up so you are always using the correct file version regardless if it is being loaded from your local storage of from cloud.
If you quit fylm.ai while upload is in progress, fylm.ai will try its best to end the upload process gracefully, however we suggest you wait for the upload process to finish before closing fylm.ai.
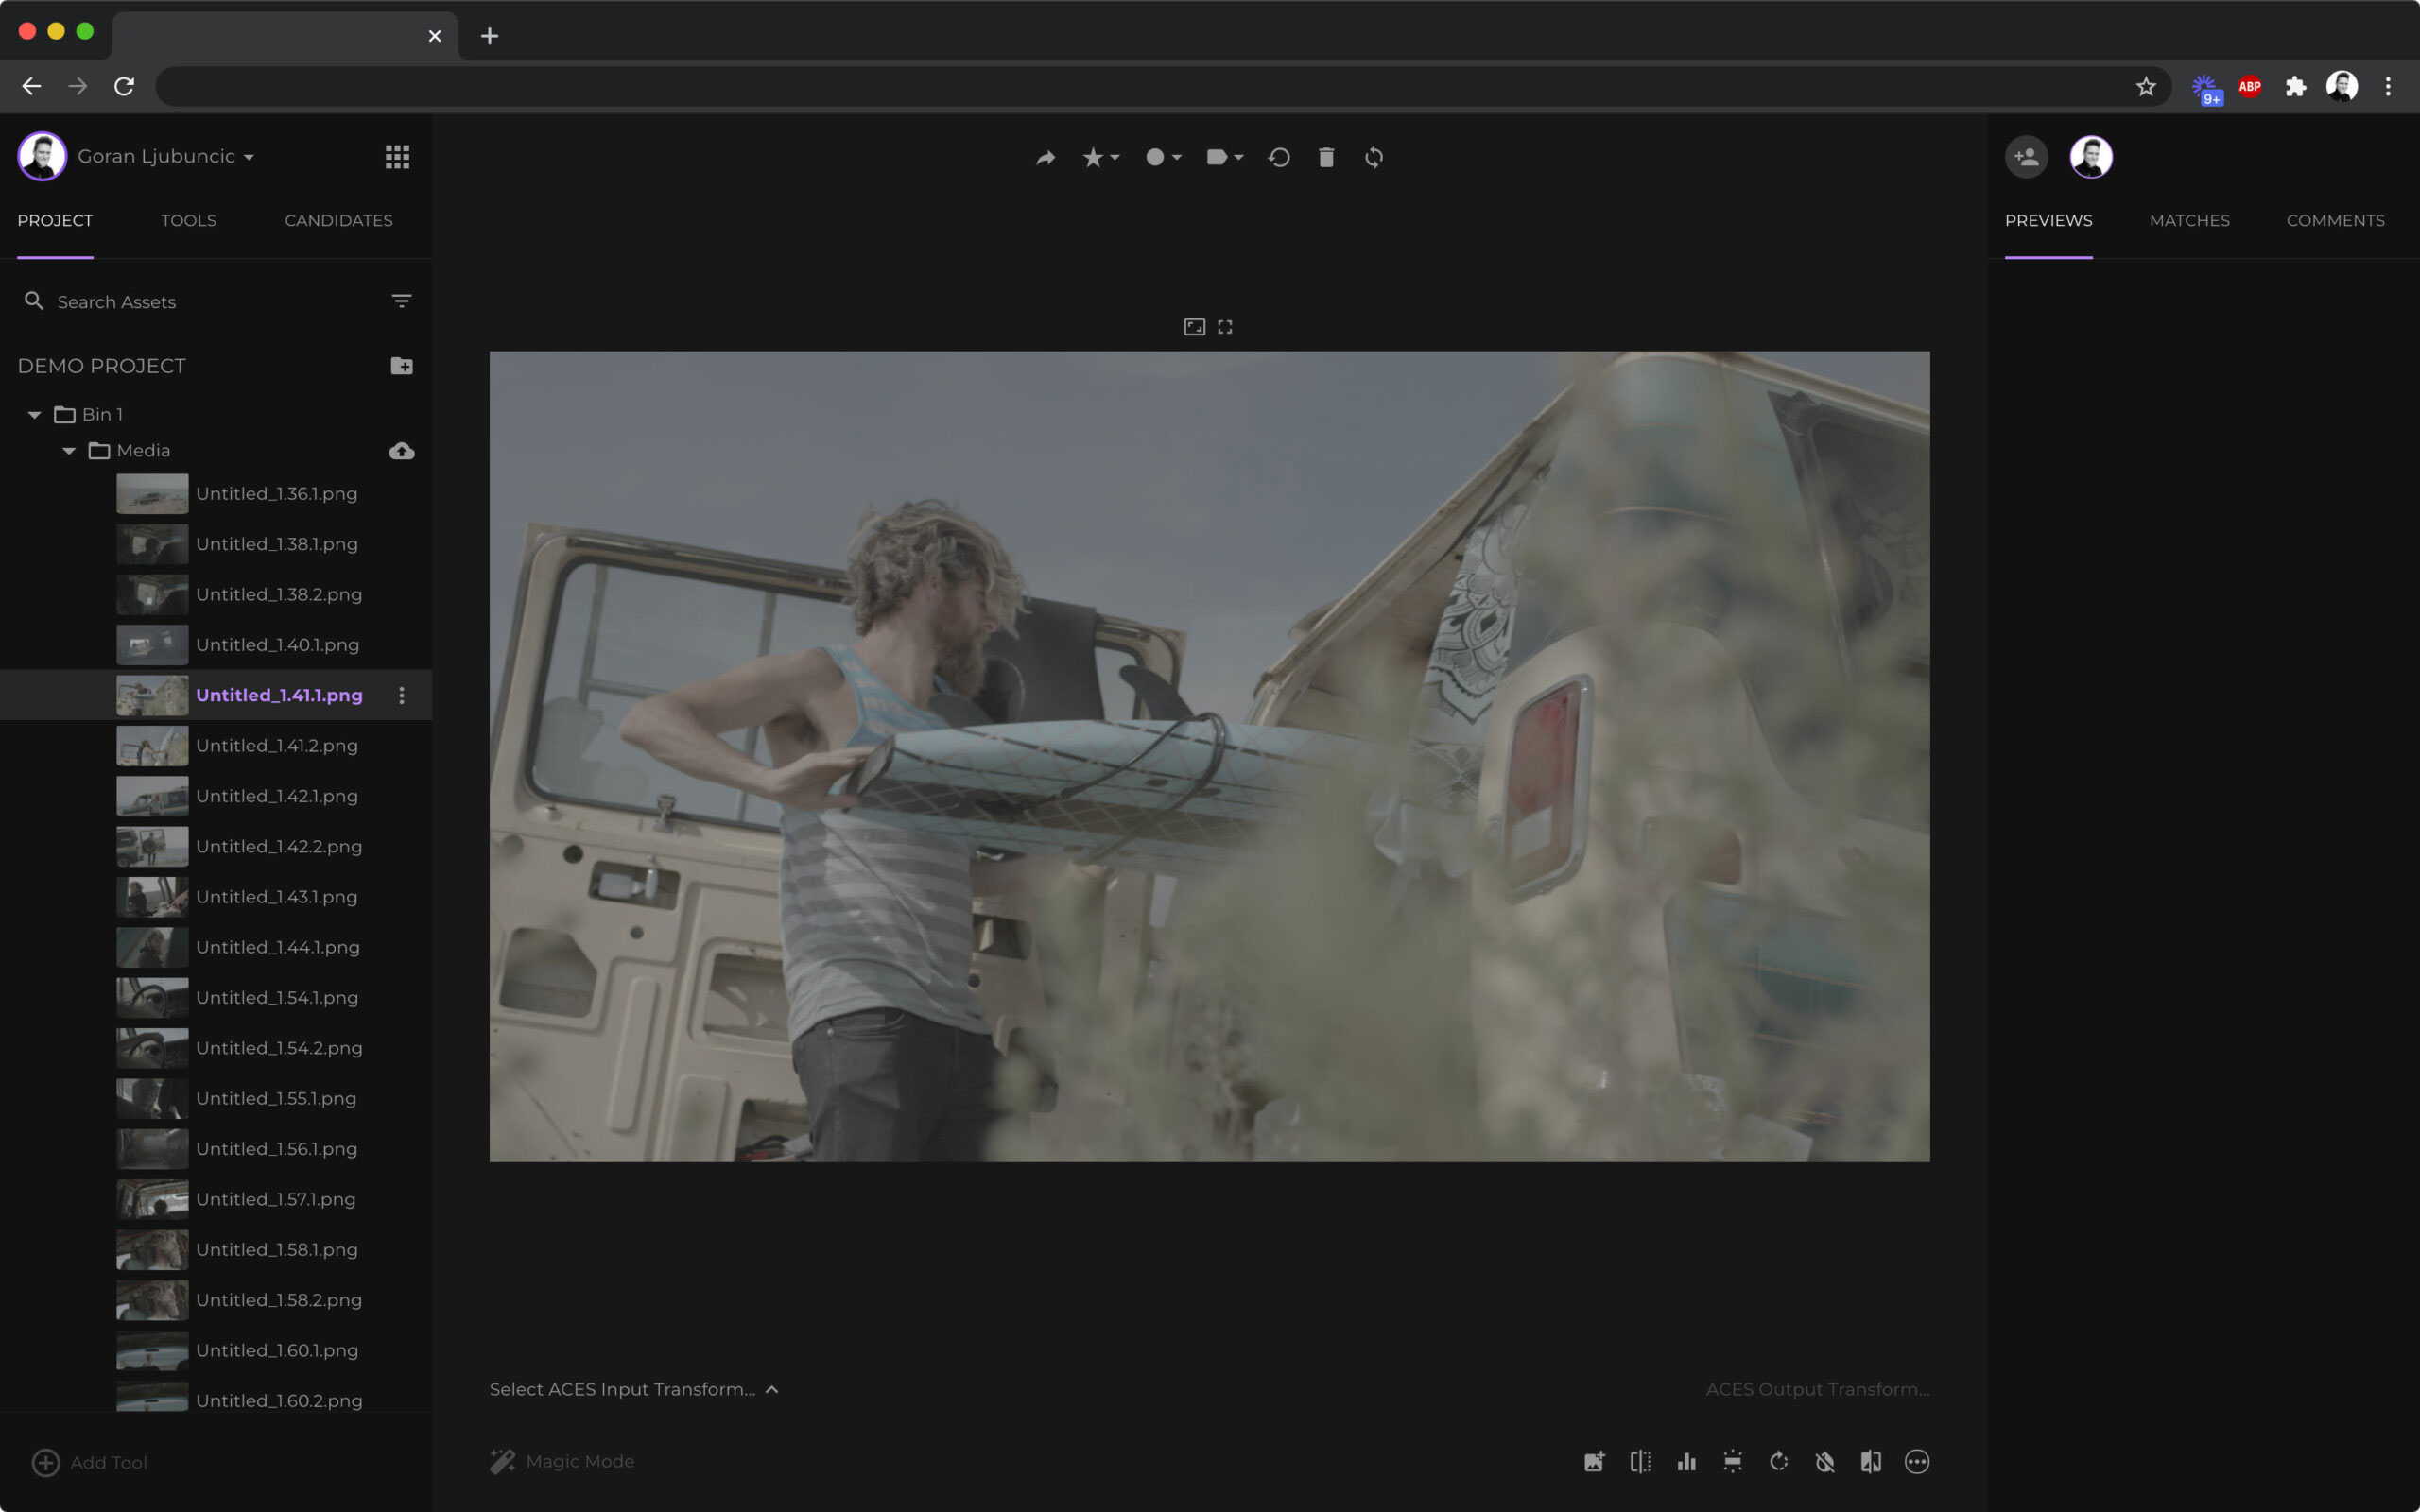
To load an image in fylm.ai simply click on the image in the project management tab.
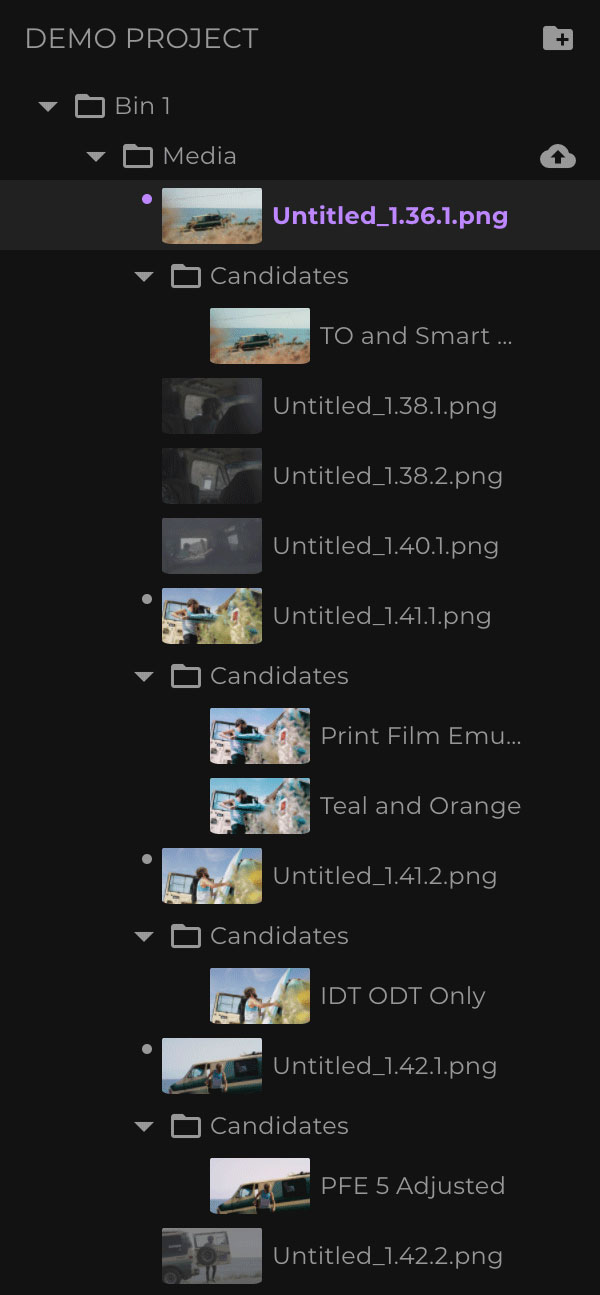
Candidates
When you create a look and save it as a Candidate, that Candidate is automatically associated with the file it was created for. This automatically creates a Candidates sub-folder associated with the file.
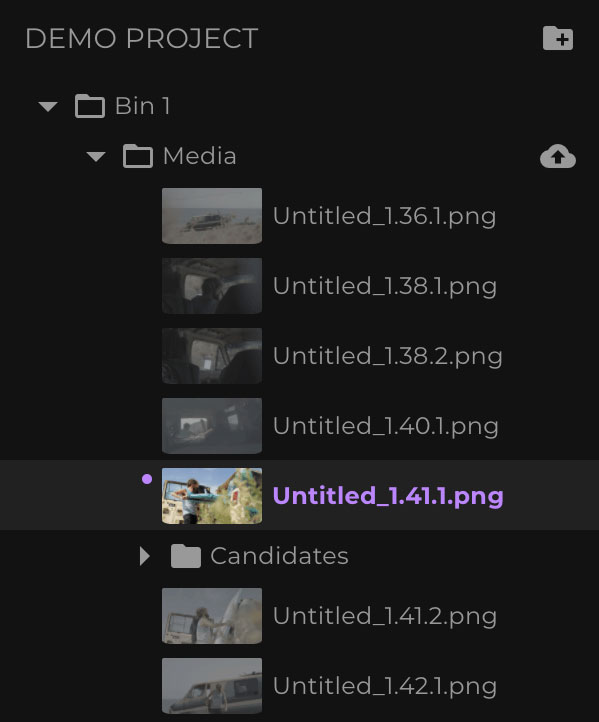
All of the Candidates created using one particular file will be associated with that file and placed in the Candidates sub-folder.
Candidates created using other files will be associated with these files respectively.
Matches
When you create a look and save it as a Match, the Match is automatically associated with the Bin in which the file used for the creation of the Match belongs to. Unlike Candidates which belong to specific files, Matches belong to the Bin. Therefore, when you save a look as a Match it is saved in Matches sub-folder of the active Bin.
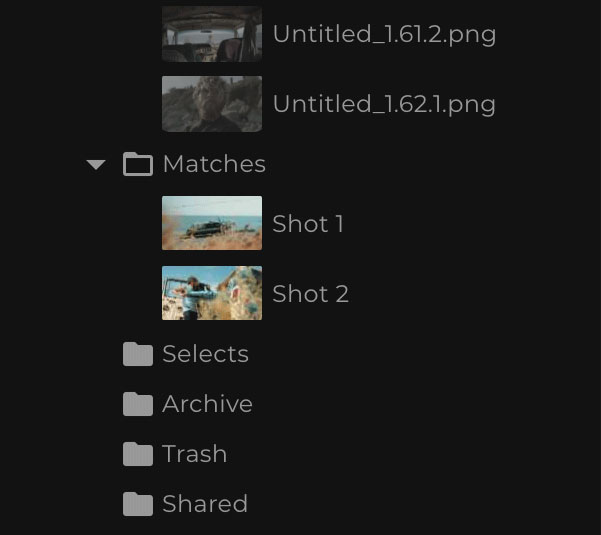
Selects
If you are particularly happy with a Candidate, you can add it to the Selects folder. Selects folder is used to group your best Candidates. That way you can easily go through only the best looks in your project. To add a Candidate to the Selects folder click on the contextual menu next to the Candidate and select the ‘Add to Selects‘ option.
Copying assets to the Selects folder does not move the items but rather copies them, however this will not increase your storage quota as the copied items are symlinked to the original assets.
Shared
When you are ready to share multiple items with your clients, it is advisable to add them to the Shared folder. To add assets to the Shared folder click on the contextual menu next to the asset and select the ‘Add to Shared‘ option. Adding assets to the Shared folder does not move the items but rather copies them, however this will not increase your storage quota as the copied items are symlinked to the original assets.
Sharing the Shared folder will share all of the items in the folder with your intended recipients.
You can also share several different assets with different recipients. To do so, click on the contextual menu next to the Shared folder. Then use the Create New Folder option to create a new sub-folder inside the Shared folder. Repeat this process to create more sub-folders. We will use each sub-folder to share it with a different group of recipients.
Then, copy the assets you would like to share with one (or more) recipients to a sub-folder inside the Shared folder. Then, to share the sub-folder, click the Share option from the contextual menu next to the sub-folder.
Repeat the process for additional sub-folders and share each of the sub-folders with the intended recipients.
Please note that when you share the root Shared folder, sub-folders are not shared if they exist. Each sub-folder must be shared separately.
Archive
When you think you no longer actively need an asset you may archive it. To do so use the Archive option from the contextual menu.
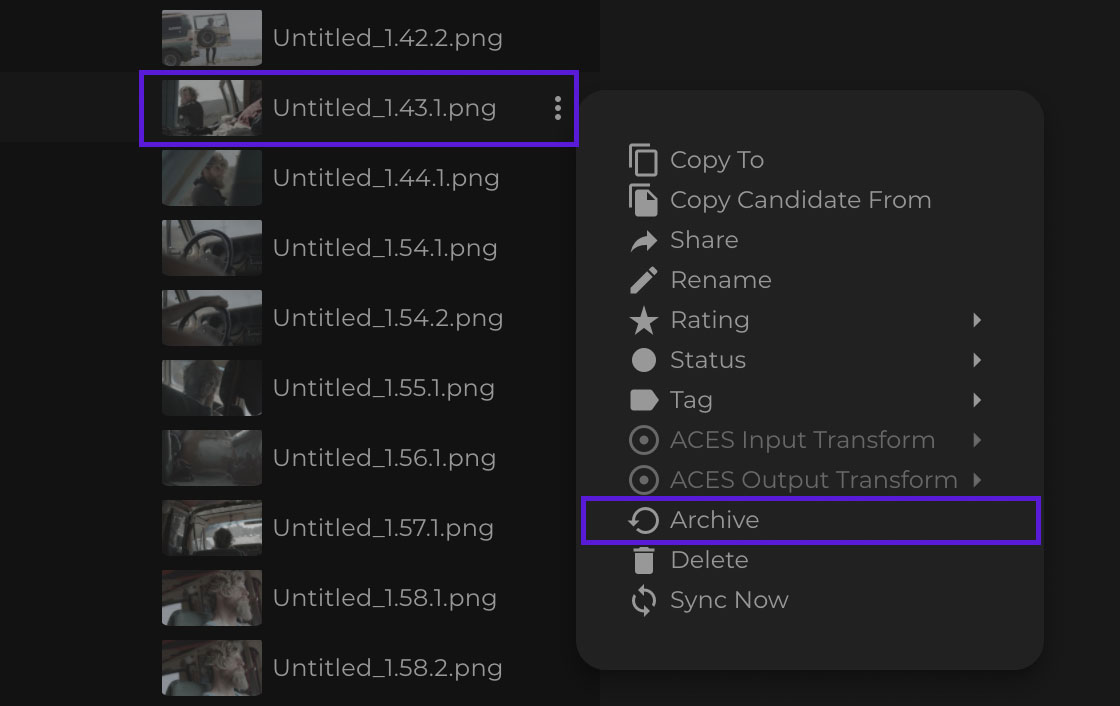
Asset that is archived is actually moved and not copied. It will no longer be available anywhere else except in the Archived folder. To restore an item back to its original location use the Restore option from the contextual menu.
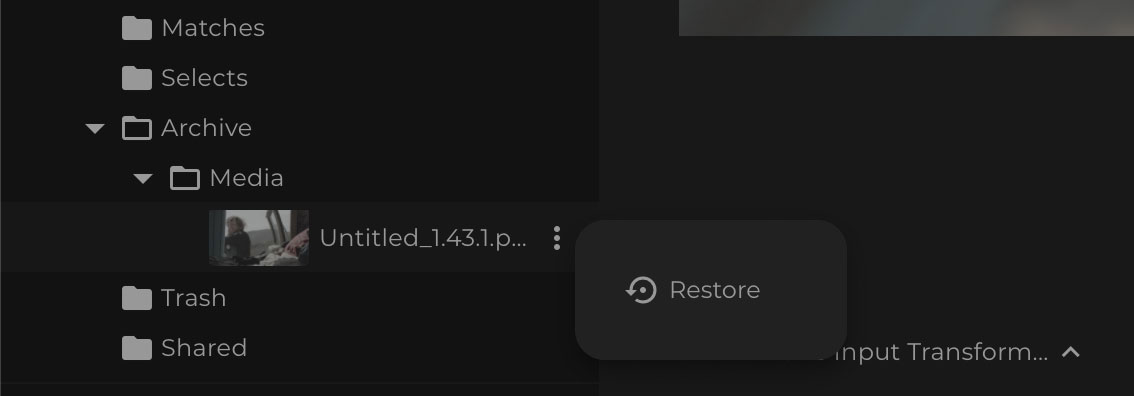
Please note, archived asset is still available to users in your organisation through the Archived folder.
Trash
When you think you no longer need an asset you may delete it. To do so use the Delete option from the contextual menu.
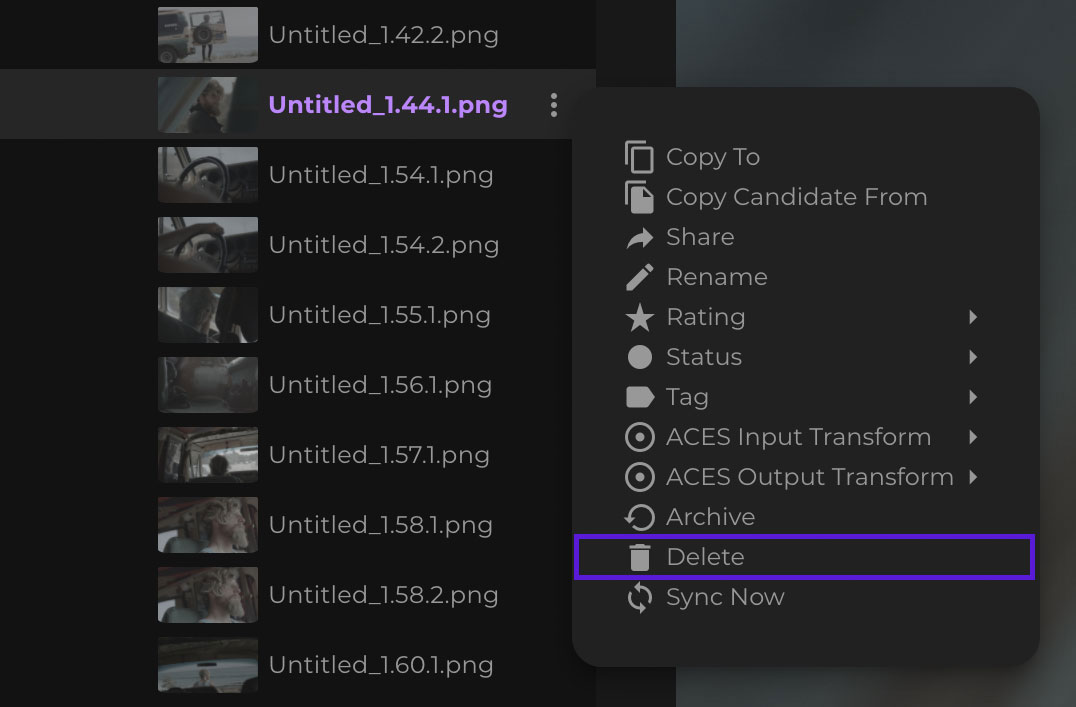
Deleting an asset requires Editor or higher permissions. To restore an item back to its original location use the Restore option from the contextual menu in the Trash folder.
Please note, once asset is deleted it is no longer available to users with Collaborator and Member permissions. It is available to users with Editor and higher permissions through the Trash folder.