Notice: The steps detailed in this document are deprecated. As of version 1.4 fylm.ai includes by default the ACES Reference Gamut Compression which fixes any out-of-gamut issues. More details are available in this blog post.
Under certain circumstances it is possible for highly saturated blue light sources to exhibit some artifacts, especially around the edges of the light source. The issue usually appears when LEDs or brightly coloured lights are shot directly into the camera. Depending on the lens and capture scenario, the camera can “see” these colors in a way that produces problematic colorimetry for some of the later ACES color transforms.
Here we have an image shot on Arri Alexa in Log-C. Image from Pomfort AMF Utility Github page, used under MIT license.
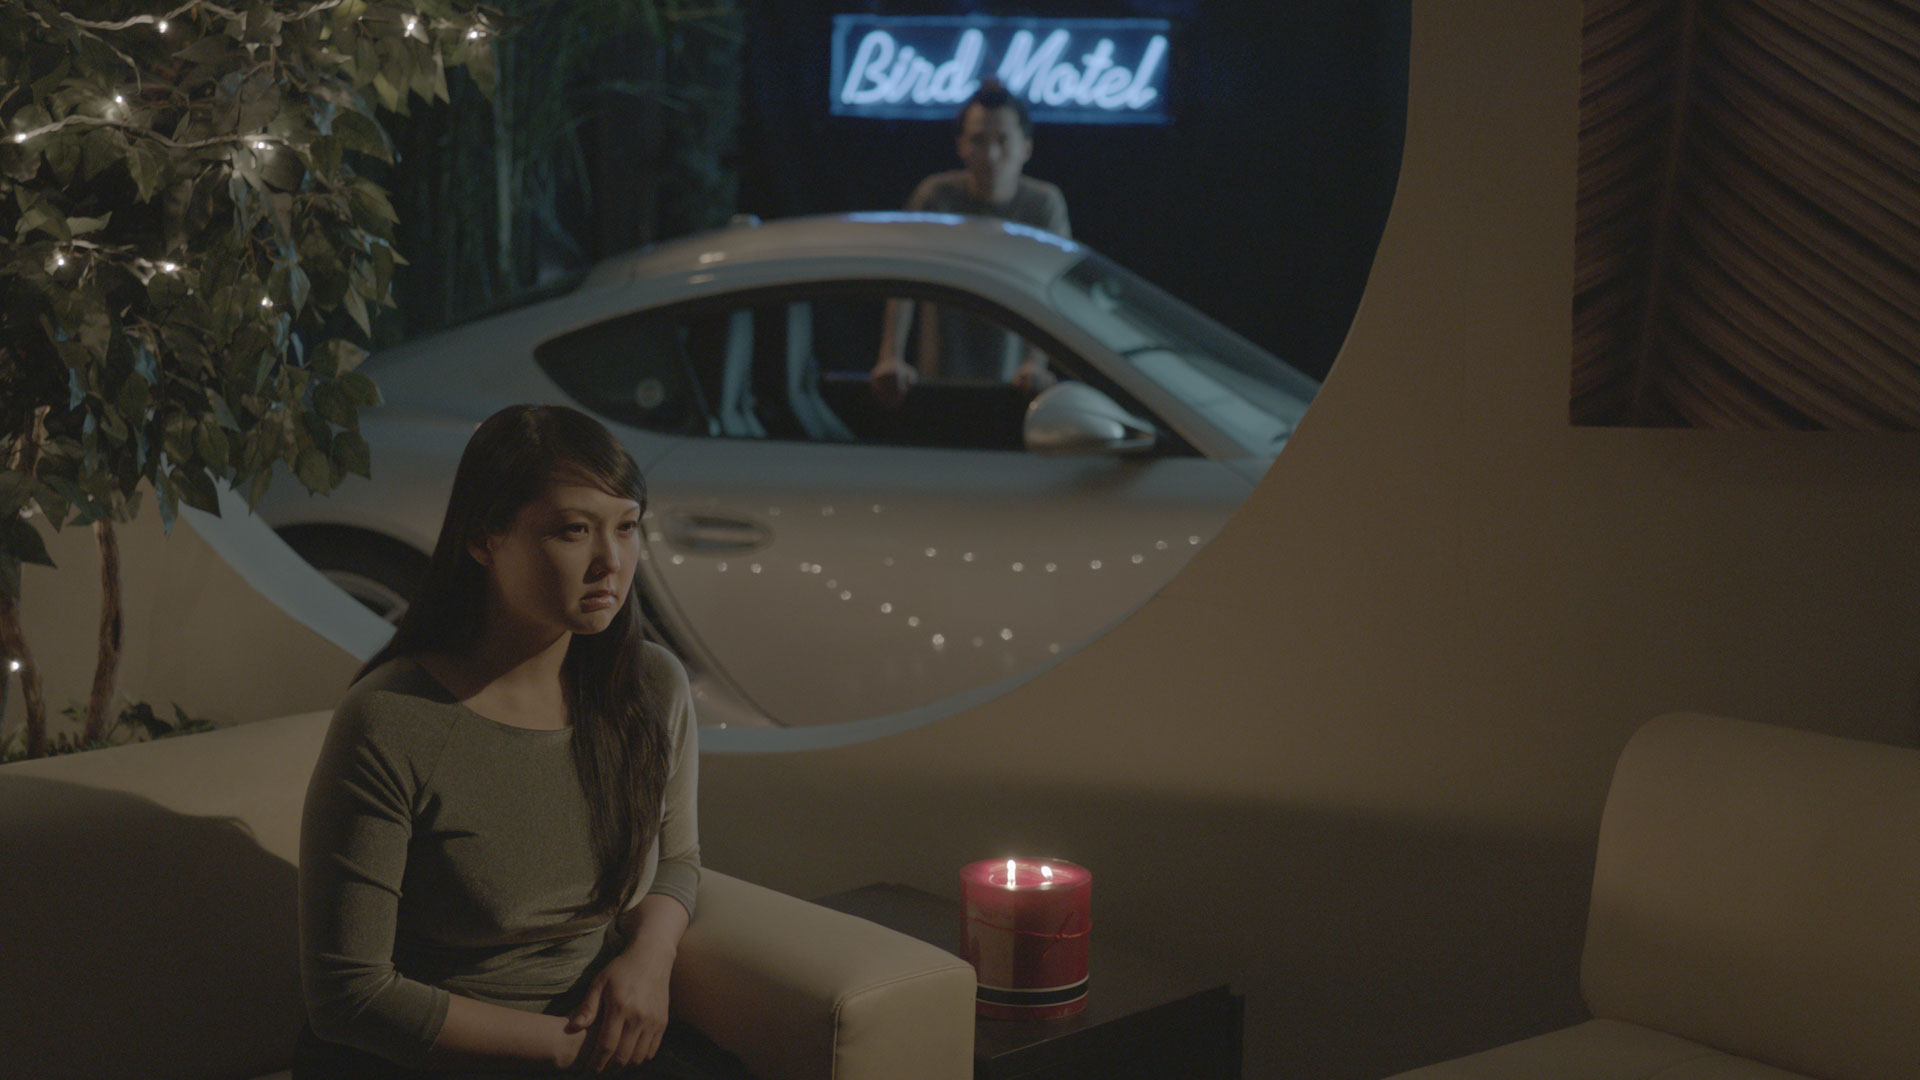
After we apply the appropriate Input Device Transform we can clearly see the aforementioned artifacts in the LED sign at the top of the image.

Solution to this problem is very simple. We should use the Fix Blue Light Artifacts button.
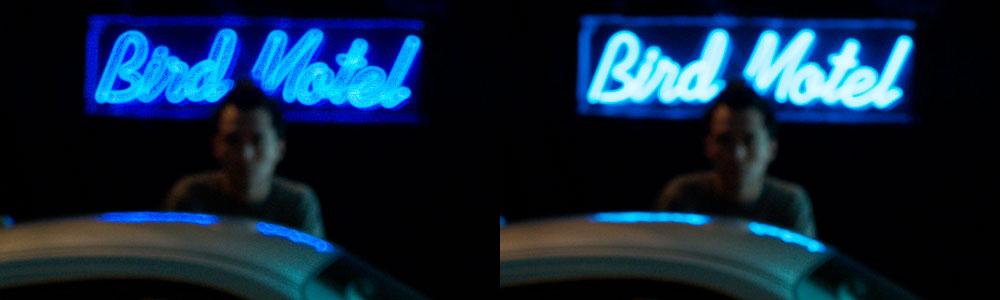
After applying the Fix Blue Light Artifacts option, the image is displayed correctly.

Here is a close-up comparison of normalised image with and without the Blue Lights Artifacts fix. On the left original, normalised image without correction applied, on the right, image after correction.
When you save a look as a Candidate or a Preset, Fix Blue Light Artifacts option is saved as well if it’s turned on. Therefore, pay attention to turn this option off if a different image your are using the Candidate or a Preset for does not need it.
When you export a LUT, Fix Blue Light Artifacts correction is included in the exported LUT if it was turned on.
We recommend to apply the ‘Fix Blue Light Artifacts’ correction only if your image exhibits such issue. Otherwise it is best leaving this option turned off.