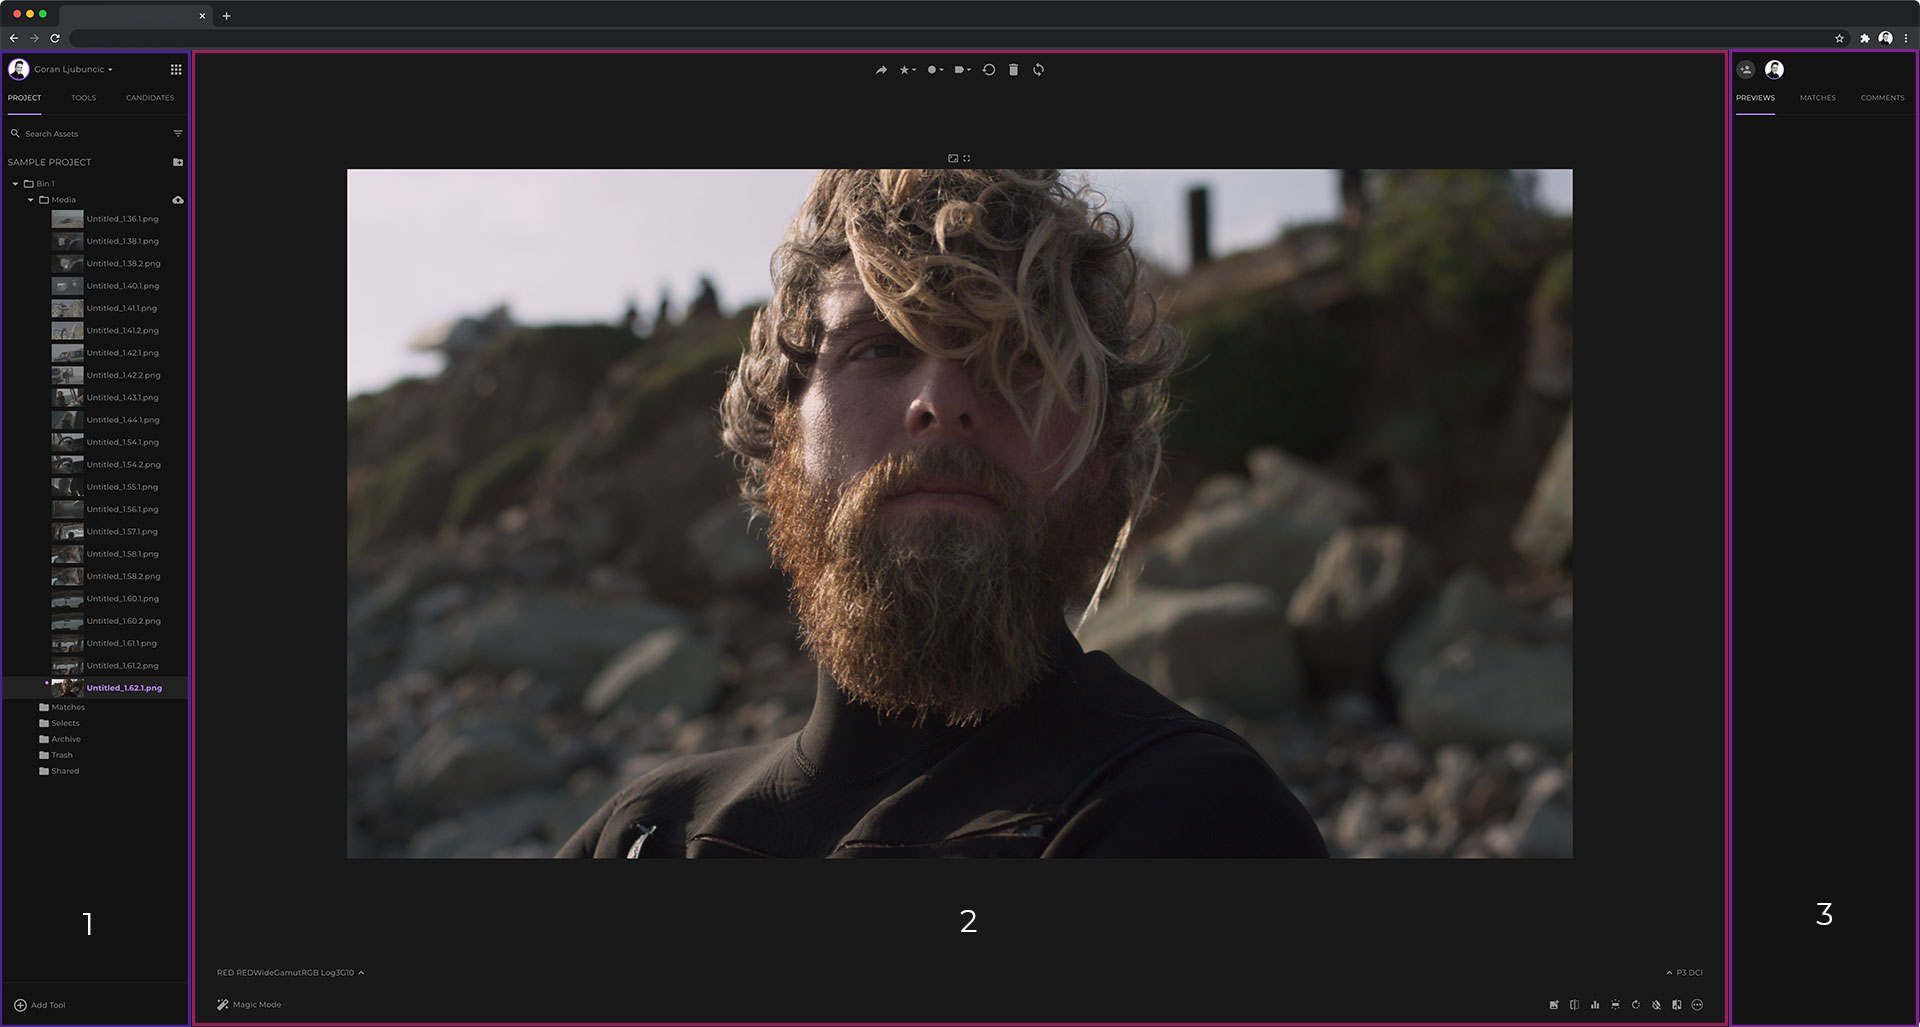
fylm.ai interface is divided into three main areas:
- Project management and colour grading column
- Main viewer area
- Preview and commenting column
Some of these columns are further divided into tabs so we will cover them one by one.
Project management and colour grading column
Project management and colour grading column is the workspace in which most of the work in fylm.ai is done. From here you can manage your project’s assets, use different tools to create the colour grade for your image and save different looks so that they are easily accessible. Let’s cover the different tabs of the project management and colour grading column.
Project tab
Includes all of the assets added to a project. Your images, candidates and matches are here. Project management tab allows you full control over the different assets in your project. Your very fist step of using fylm.ai will begin here as this is the tab you will use to upload the images to your project.
For detailed instructions on using the project management tab please see this document.
Tools tab
Tools tab includes all of the colour grading tools available in fylm.ai. Instead of listing all of the tools available, fylm.ai takes a slightly different approach. You only add the tools that you want to use.
For detailed instructions on using the tools tab please see this document.
Candidates tab
When you create a candidate in fylm.ai it will appear in the candidates and project management tab. You can load a Candidate from either location, however candidates tab offers a real-time preview of the look that you have created. This allows you to judge more easily the different candidates that you have created and how they affect your image.
For detailed instructions on using Candidates please see this document.
Main viewer area
Main viewer area can be divided into 2 main parts. In the middle part, it shows the image that you’re currently working with in fylm.ai. All changes that you make in fylm.ai are displayed in real-time in this area.
In the bottom part of the main viewer area you will find buttons which add important functionality to fylm.ai. For detailed instructions on different buttons in the main viewer area, please see this document.
Preview and commenting column
Preview and commenting column includes important visual aides for your colour grading session as well as commenting functionality which greatly enhances the communication surrounding a particular colour grade.
Previews tab
Whenever you use a tool in fylm.ai which includes preset looks, Previews tab will show the effect these looks would have on your image if they were to be applied. That way, any guesswork is eliminated as you always know what a particular look would look like if it were to be applied. Having a preview ahead of actually applying it, allows you to decide whether a certain look will work, or not, for the type of colour grade you are trying to create.
Each thumbnail in the preview tab represents a different look available in the selected tool and it can be applied on the main image by clicking the corresponding thumbnail.
Matches tab
Whenever you create a Match in fylm.ai, it can be accessed from the Matches tab.
For detailed instructions on using Matches please see this document.
Comments tab
Comments tab includes all of the communications surrounding the colour grades in fylm.ai
For detailed instructions on using comments in fylm.ai please see this document.

